





Esp32-cam Whatsapp Image Alert

Made by electroscope_archive / Artificial intelligence
About the project
Capture a photo with ESP32-CAM and send it instantly to WhatsApp with a single button press.
Project info
Items used in this project


Story
The ESP32-CAM is one of the most versatile development boards for IoT projects. It combines an ESP32 microcontroller, a camera module, Wi-Fi connectivity, and an onboard flash LED in a compact and inexpensive package. In this project, we use these features to build a simple system that captures a photo and sends it directly to WhatsApp.
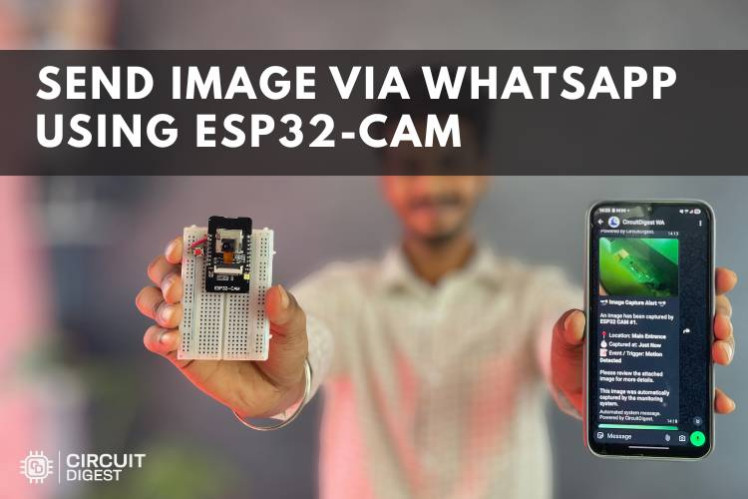
Press a push button, and within seconds, the ESP32-CAM takes a picture and delivers it to your phone as a WhatsApp message. This project is ideal for smart doorbells, security alerts, industrial monitoring, and any application where you need instant image notifications.
This project uses the CircuitDigest Cloud API to handle the WhatsApp message delivery. The ESP32-CAM captures the image, uploads it over HTTPS, and the cloud service forwards it to the configured WhatsApp number.
Why This Project Is Useful
Sending images directly from a microcontroller opens up many possibilities:
- Smart doorbell notifications
- Motion-triggered security alerts
- Machine monitoring
- Wildlife cameras
- Remote visual inspection
- IoT learning and experimentation
Instead of checking an app or dashboard, you receive the image in WhatsApp, which is already installed on almost every smartphone.
How the System Works
The workflow is straightforward:
- The ESP32-CAM connects to your Wi-Fi network.
- A push button connected to GPIO 13 acts as the trigger.
- When the button is pressed, the onboard flash LED turns on briefly.
- The camera captures a JPEG image.
- The ESP32-CAM sends the image to CircuitDigest Cloud using a secure HTTPS POST request.
- The cloud service forwards the image to your WhatsApp number.
- The message includes the captured photo and event details such as time and device name.
The entire process usually takes only a few seconds, depending on Wi-Fi speed and server response time.
Components Required
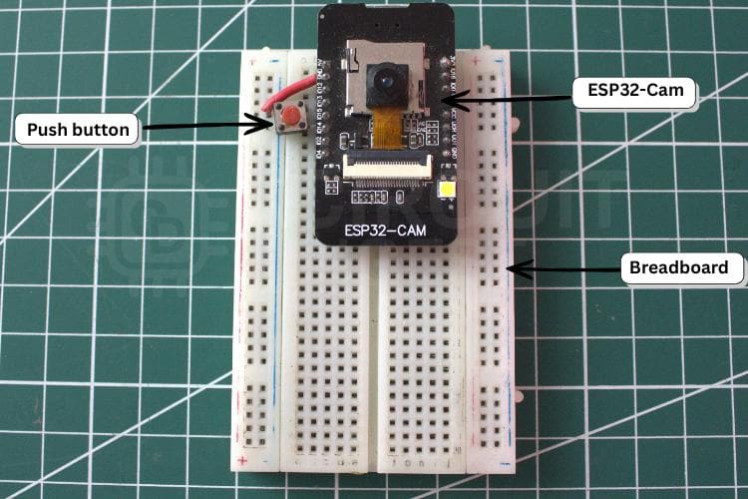
- ESP32-CAM
- Push button
- Breadboard
- Jumper wires
- 5 V power supply
- USB-to-Serial adapter (if your board does not have onboard USB)
Circuit Connections
The hardware is intentionally simple.
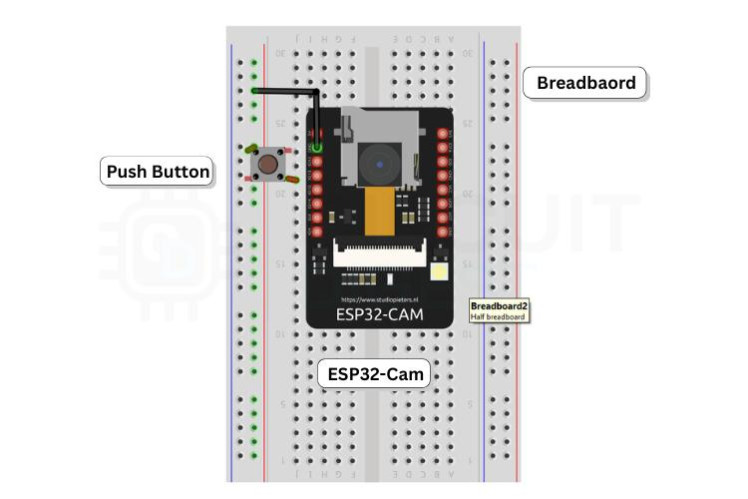
Push Button
- One terminal of the button → GPIO 13
- Other terminal → GND
GPIO 13 is configured using the internal pull-up resistor, so it reads HIGH normally and LOW when the button is pressed.
Built-In Flash LED
The onboard flash LED is connected to GPIO 4 and is used to illuminate the scene during image capture.
Power
Use a stable 5 V supply. The ESP32-CAM can draw significant current during Wi-Fi transmission and camera operation, so a weak USB port may cause brownout resets.
Setting Up CircuitDigest Cloud
Before uploading the code, create an account on the CircuitDigest Cloud platform.
You will need:
- API key
- Verified WhatsApp number
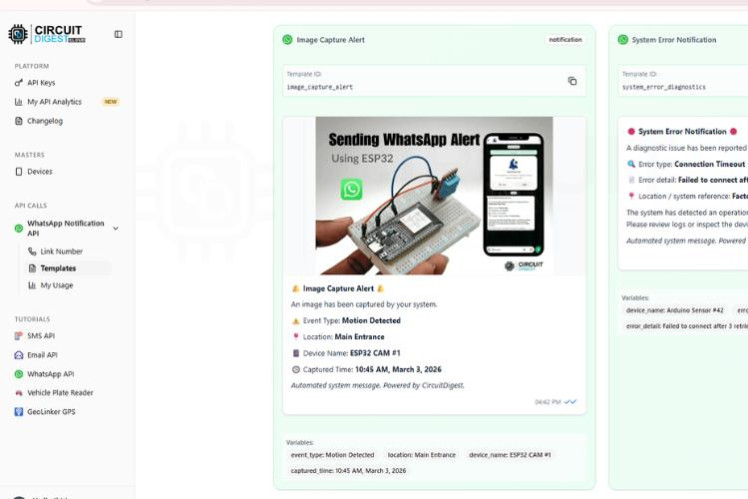
- Message template ID (
image_capture_alert)
These credentials are added to the Arduino sketch so the ESP32-CAM can authenticate with the cloud API and send messages.
Installing Required Libraries
In the Arduino IDE, ensure the ESP32 board package is installed. The sketch uses:
-
esp_camera.h -
WiFi.h -
WiFiClientSecure.h -
time.h
No additional third-party libraries are required beyond the official ESP32 core.
Configuring the Code
Update the following variables in the sketch:
const char *ssid = "YOUR_WIFI_NAME";
const char *pwd = "YOUR_WIFI_PASSWORD";
const char *apiKey = "YOUR_API_KEY";
const char *phone = "YOUR_WHATSAPP_NUMBER";
Replace each value with your own credentials.
Camera Initialization
The camera is configured for JPEG capture. If PSRAM is available, the sketch uses VGA resolution for better image quality. Otherwise, it falls back to QVGA to conserve memory.
cfg.frame_size = psramFound() ? FRAMESIZE_VGA : FRAMESIZE_QVGA;
cfg.jpeg_quality = psramFound() ? 10 : 12;
cfg.fb_count = psramFound() ? 2 : 1;
This adaptive configuration ensures reliable performance across different ESP32-CAM boards.
Capturing the Image
When the button is pressed:
- The code debounces the button input.
- The flash LED turns on.
- The camera captures a frame.
- The image is copied into dynamically allocated memory.
- The original camera frame buffer is released.
Copying the image into a separate buffer is important because it allows the camera to be deinitialized and frees RAM before the HTTPS upload.
Sending the Image to WhatsApp
The image is uploaded using a multipart/form-data POST request over HTTPS.
The request contains:
- Phone number
- Template ID
- JSON variables (event type, location, device name, timestamp)
- JPEG image file
The ESP32-CAM uses WiFiClientSecure with TLS encryption to connect to the cloud server securely.
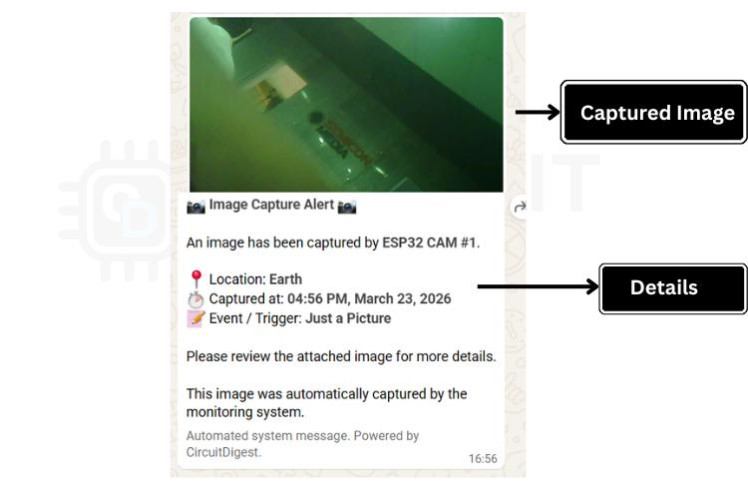
Time Synchronization
The project synchronizes with an NTP server to include a human-readable timestamp in the WhatsApp message.
configTime(19800, 0, "pool.ntp.org");
The offset 19800 corresponds to Indian Standard Time (UTC+5:30). Adjust this value for your own timezone if needed.
Uploading the Sketch
- Connect the ESP32-CAM to your computer.
- Select AI Thinker ESP32-CAM from the Arduino IDE board menu.
- Enter your credentials in the sketch.
- Upload the code.
- Open the Serial Monitor at 115200 baud.
- Wait until it
Ready!appears.
Testing the Project
Press the push button.
If everything is configured correctly:
- The onboard flash LED turns on briefly.
- The ESP32-CAM captures a photo.
- The image is uploaded to CircuitDigest Cloud.
- You receive the photo in WhatsApp within a few seconds.
Applications
Smart Doorbell
Capture a visitor’s photo and send it to your phone when the doorbell is pressed.
Security Monitoring
Trigger the camera using a PIR sensor to send images when motion is detected.
Industrial Alerts
Receive visual updates when a machine enters an alarm state.
Wildlife Observation
Capture and send photos from remote locations.
Educational Projects
Learn about camera interfacing, HTTPS communication, and IoT notifications.
Troubleshooting
Brownout Detector Errors
Use a stable 5 V power source capable of delivering sufficient current.
Camera Initialization Failed
Verify that the correct board type is selected and camera pins match the AI-Thinker module.
Wi-Fi Connection Fails
Ensure you are using a 2.4 GHz network.
WhatsApp Message Not Sent
Check the API key, phone number, and template ID.
Image Is Too Dark
Increase ambient light or adjust flash timing.
Ideas for Upgrades
This project can be expanded in many ways:
- Replace the button with a PIR motion sensor
- Add door/window magnetic switches
- Store images on a microSD card
- Send alerts to multiple recipients
- Include battery backup
- Build a web dashboard for remote monitoring
Final Thoughts
This project demonstrates how easy it is to turn the ESP32-CAM into a practical visual notification system. With just a few components and a cloud API, you can receive real-time photos directly in WhatsApp.
Because WhatsApp is a platform people already use every day, this approach makes IoT alerts more immediate and accessible than traditional dashboards or email notifications.
Whether you are building a smart security system, a remote monitoring device, or simply exploring embedded IoT, this ESP32-CAM WhatsApp Image Alert project is a powerful and rewarding build.
Explore hands-on tutorials, circuit diagrams, and source code for innovative IoT and embedded builds in this curated collection of ESP32 projects.
Schematics, diagrams and documents
Code
Credits
Related products





Leave your feedback...