
Connecting Raspberry Pi Pico W's With Mqtt

Made by mahmood-m-shilleh
About the project
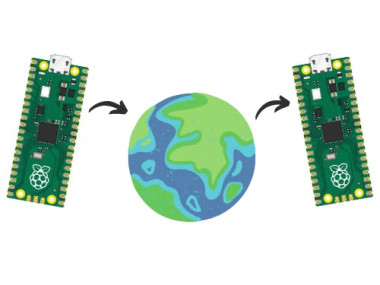
Send messages between Raspberry Pi Pico W's from anywhere using MQTT Broker HiveMQ in MicroPython!
Project info
Difficulty: Moderate
Platforms: MicroPython
Estimated time: 1 hour
License: GNU Lesser General Public License version 3 or later (LGPL3+)
Items used in this project

Story
Before you get started, be sure to subscribe to the channel for the fastest updates!
Learn how to send information between Raspberry Pi Pico W’s anywhere using MQTT in MicroPython. By the end of this tutorial, you will be able to send messages between multiple Raspberry Pi Pico W’s to build a true IoT distributed system. This has powerful implications for a wide range of applications, best of all, everything shown in this video is all free to work with.
Before getting started, please consider subscribing or supporting channel by donating in the link down below to allow us to produce more content!
Subscribe:
Support:
https://www.buymeacoffee.com/mmshilleh
Step 1-) Allow multiple Thonny InstancesTo do this, open up Thonny and head to Tools > Options > General and untick 'Allow only single Thonny instance'.
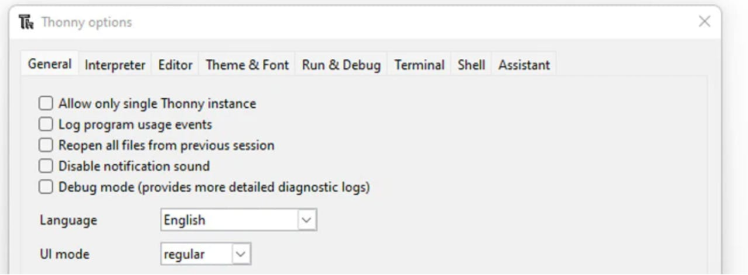
Restart Thonny to activate this behavior.
You do not need to do this if you have Thonny on another computer, this is only needed if you want to connect more than one Pico W on the same computer!
Nonetheless, once you do have the behavior activated you simply want to open another Thonny instance.
To open another instance on a Mac, go to the Terminal and run the following code:
/Applications/Thonny.app/Contents/MacOS/thonny
After running this you should see another Thonny instance pop up.
If you are using Windows or Linux, the process is a little different. You can open cmd and do something similar or you can double-tap the application to open another instance.
Afterward, you can select the corresponding device in the corresponding Thonny instances. If you have the devices connected to your computer you should be able to connect both in the separate screens.
Step 2-) Setup MQTT Client HiveMQYou will now need to use MQTT (Message Queuing Telemetry Transport) to handle the information you are sending between devices. MQTT is a lightweight messaging protocol designed for efficient communication between devices in an Internet of Things (IoT) environment. It follows a publish-subscribe model, where devices can publish messages to specific topics, and other devices can subscribe to those topics to receive the messages. MQTT's lightweight nature makes it ideal for constrained environments with limited bandwidth or processing power.
To facilitate MQTT communication, you can utilize HiveMQ with MicroPython to access their cloud infrastructure. HiveMQ is a popular MQTT broker that acts as a central hub for routing messages between devices. It ensures reliable delivery of messages and provides advanced features such as authentication, access control, and message persistence. HiveMQ enables seamless integration of MQTT into your IoT ecosystem, allowing devices to communicate with each other in a secure and scalable manner. It simplifies the complexity of managing MQTT infrastructure and provides a robust solution for building resilient and responsive IoT applications.
By incorporating MQTT and leveraging tools like HiveMQ, you can establish a reliable and efficient communication framework for your IoT devices, enabling them to exchange information seamlessly and enabling you to build powerful and interconnected IoT applications.
To get started:
- Go to https://www.hivemq.com/mqtt-cloud-broker/ and click “Try out for free”
- Navigate to https://console.hivemq.cloud/
- Create a cluster, and a username and password in the access management tab.
- Save the username, password, and cluster URL because you will need this in the micropython library
Simple as that! Now you have the broker ready to deal with your messages
Step 3-) CodeOn all Pico W’s add the following library code:
simple.py - https://github.com/micropython/micropython-lib/blob/master/micropython/umqtt.simple/umqtt/simple.py
robust.py - https://github.com/micropython/micropython-lib/tree/master/micropython/umqtt.robust/umqtt
This code will allow you to easily publish and subscribe to topics from the MQTT broker over the internet.
On one Pico W run the following code:
#Native libs
import network
import time
import random

#Third Party
from umqtt.robust import MQTTClient

# Internal libs
import constants


def connectMQTT():
    '''Connects to Broker'''
    # Client ID can be anything
    client = MQTTClient(
        client_id=b"mahmood",
        server=constants.SERVER_HOSTNAME,
        port=0,
        user=constants.USER,
        password=constants.PASSWORD,
        keepalive=7200,
        ssl=True,
        ssl_params={'server_hostname': constants.SERVER_HOSTNAME}
    )
    client.connect()
    return client


def connect_to_internet(ssid, password):
    # Pass in string arguments for ssid and password

    # Just making our internet connection
    wlan = network.WLAN(network.STA_IF)
    wlan.active(True)
    wlan.connect(ssid, password)

    # Wait for connect or fail
    max_wait = 10
    while max_wait > 0:
      if wlan.status() < 0 or wlan.status() >= 3:
        break
      max_wait -= 1
      print('waiting for connection...')
      time.sleep(1)
    # Handle connection error
    if wlan.status() != 3:
       print(wlan.status())
       raise RuntimeError('network connection failed')
    else:
      print('connected')
      print(wlan.status())
      status = wlan.ifconfig()

def make_connections():
    # Connect to internet and set MPU to start taking readings
    connect_to_internet(constants.INTERNET_NAME, constants.INTERNET_PASSWORD)
    return connectMQTT()


def publish(topic, value, client):
    '''Sends data to the broker'''
    print(topic)
    print(value)
    client.publish(topic, value)
    print("Publish Done")


client = make_connections()

while True:

    publish('Topic', 'test _message', client)

    time.sleep(1)
Some notes about this code:
This code publishes data to the topic called ‘Topic’ in HiveMQ, sending the same message every second. You can change these based on your application
- This code publishes data to the topic called ‘Topic’ in HiveMQ, sending the same message every second. You can change these based on your application
- You will need to substitute constants accordingly
- Client id does not have to be “mahmood”
If all of your constants are filled in correctly, this should easily run on your first device
On your other device, we want to subscribe to the topic and to check if we are getting the messages. To do so, run the following code on your other device.
#Native libs
import network
import time

#Third Party
from umqtt.simple import MQTTClient

# Internal libs
import constants


def connectMQTT():
    '''Connects to Broker'''
    # Client ID can be anything
    client = MQTTClient(
        client_id=b"other client",
        server=constants.SERVER_HOSTNAME,
        port=0,
        user=constants.USER,
        password=constants.PASSWORD,
        keepalive=7200,
        ssl=True,
        ssl_params={'server_hostname': constants.SERVER_HOSTNAME}
    )
    client.connect()
    return client


def connect_to_internet(ssid, password):
    # Pass in string arguments for ssid and password

    # Just making our internet connection
    wlan = network.WLAN(network.STA_IF)
    wlan.active(True)
    wlan.connect(ssid, password)

    # Wait for connect or fail
    max_wait = 10
    while max_wait > 0:
      if wlan.status() < 0 or wlan.status() >= 3:
        break
      max_wait -= 1
      print('waiting for connection...')
      time.sleep(1)
    # Handle connection error
    if wlan.status() != 3:
       print(wlan.status())
       raise RuntimeError('network connection failed')
    else:
      print('connected')
      print(wlan.status())
      status = wlan.ifconfig()

def make_connections():
    # Connect to internet and set MPU to start taking readings
    connect_to_internet(constants.INTERNET_NAME, constants.INTERNET_PASSWORD)
    return connectMQTT()


def my_callback(topic, response):
    # Perform desired actions based on the subscribed topic and response
    print("Received message on topic:", topic)
    print("Response:", response)


def subscribe(topic, client):
    '''Recieves data from the broker'''
    client.subscribe(topic)
    print("Subscribe Done")

client = make_connections()
client.set_callback(my_callback)
subscribe('Topic', client)

while True:
   time.sleep(5)
   client.check_msg()
Some notes about this code.
- This code simply reads from the topic we created, it needs a callback function for the library so that it can display the messages accordingly.
- Be sure to change the client id to be different than your first client, or you will get an error.
If you setup this correctly you should start to see the messages in the display console upon every interval! That is it, you did it, congrats.
Let me know if you have any questions and please do not forget to like, comment, and subscribe if you took away any new information from this tutorial. Hope you go and create some powerful distributed systems with these tools.
Credits
mahmood-m-shilleh
Mechanical and Software Engineering Background. University at Buffalo 2019 Texas A&M 2021 I make data pipelines for my day job. Outside of work, I participate in online communities regarding Full Stack Engineering, Microelectronics, and more. You can find more details about me on my Youtube Channel. https://www.youtube.com/@mmshilleh Feel free to reach out!
Related products


Leave your feedback...