
Connect Bme280 To Raspberry Pi Pico Using Circuitpython

Made by mahmood-m-shilleh
About the project
I quickly show you how to connect to the BME280 sensor using the Raspberry Pi Pico and CircuitPython
Project info
Difficulty: Easy
Platforms: Raspberry Pi
Estimated time: 1 hour
License: GNU General Public License, version 3 or later (GPL3+)
Items used in this project
Hardware components

Story
Using the BME280 sensor in CircuitPython is a great way to start getting sensor readings easily. Adafruit makes it easy to port their library and start working with your Temperature, Pressure, and Humidity readings! In general, the BME280 is a powerful and low-cost sensor to start getting such readings. It is superior to its often confused counterpart, the BMP280... since the BMP280 cannot give humidity readings while the BME280 can. As we know, humidity is a vital part of any environmental system so I highly recommend this sensor if you are developing a DIY project!
If you do find this useful please like comment and subscribe:Step 1: Connect the Sensor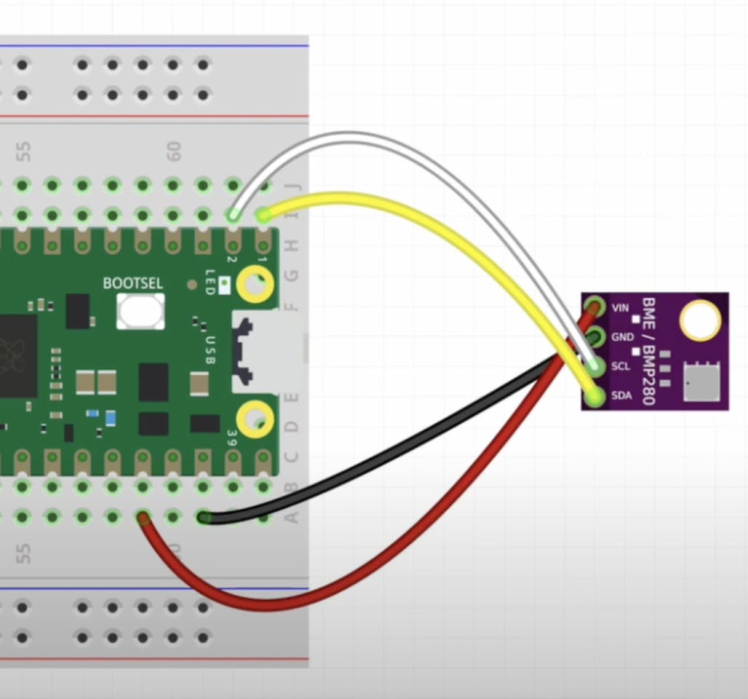
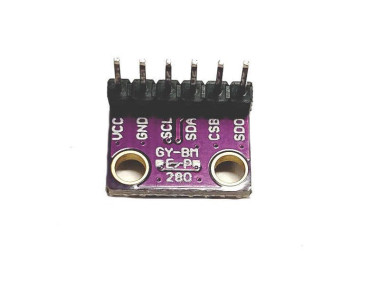
Note that some BME280 sensors are designed differently, and some have extra connections. You only need to make the 4 connections shown above (VCC, GND, SCL, SDA), which all BME280 sensors explicitly have, to have the physical setup set to start retrieving sensor values.
Also, be sure to connect your device to power once you are ready to go!
Step 2: Download the Libraries From the AdaFruit Website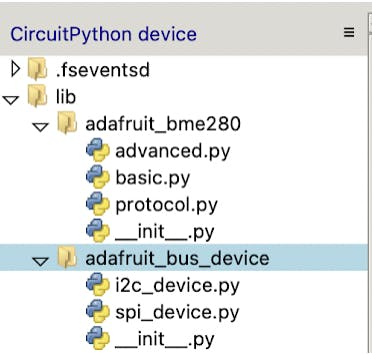
The library for CircuitPython for the BME280 is found here.
Click Download Project Bundle and it will download a zip file with the library contents, there are two folders you need to extract and port to your lib folder on your Raspberry Pi Pico.
Your directory/file structure for the library should resemble the structure seen in the photo.
If you cannot copy and paste the files over you have to manually create the directory and file names and copy the content sadly. Unfortunately, Thonny is not the most robust IDE...
Step 3: Run the Sample CodeCreate a Python file named by your choice and copy the contents from my GitHub page here.
You may have to alter the I2C device address in the code to 77 as opposed to 76, depending on what version of the BME280 you are using. But once you have that down you are done!
You can now run this code in Thonny if you added the libraries and made the proper physical connections! You can also alter the time.sleep() value if you want to get readings slower or faster.
You should be all set to get your sensor values in CircuitPython if you followed this tutorial. Please like comment and subscribe to the channel if you found this useful. Now go make a weather station or something!
Credits
mahmood-m-shilleh
Mechanical and Software Engineering Background. University at Buffalo 2019 Texas A&M 2021 I make data pipelines for my day job. Outside of work, I participate in online communities regarding Full Stack Engineering, Microelectronics, and more. You can find more details about me on my Youtube Channel. https://www.youtube.com/@mmshilleh Feel free to reach out!
Related products


Leave your feedback...