
Building A Map Using Lidar With Ros Melodic On Jetson Nano

Made by shakhizat
About the project
This tutorial will cover how to install ROS Melodic on the Jetson Nano and build a map of our environment using LiDAR and Hector SLAM.
Project info
Items used in this project

Story
Robot Operating System(ROS) is one of the popular open-source based robotics projects. The latest and current ROS1 distribution is ROS Noetic with Ubuntu 20.04 LTS Focal Fossa support. As you maybe know, ROS Noetic does not support JetPack 4.4 which comes with Ubuntu 18.04 Bionic. So, sudo apt-get install ros-noetic command will not be executed here. You can install and build ROS Noetic from source for Ubuntu 18.04 if you want, however it can be a frustrating and time-consuming process.
So, ROS Melodic Morenia, is primarily targeted to Ubuntu 18.04, which is why we have this installation tutorial on 18.04. In this tutorial, I show you how to build a map using Hector SLAM, ROS Melodic Morenia Middleware and RPLidar A1M8 on the NVIDIA Jetson Nano.
Hardware requiredBefore you get started with this tutorial, you will need the following:
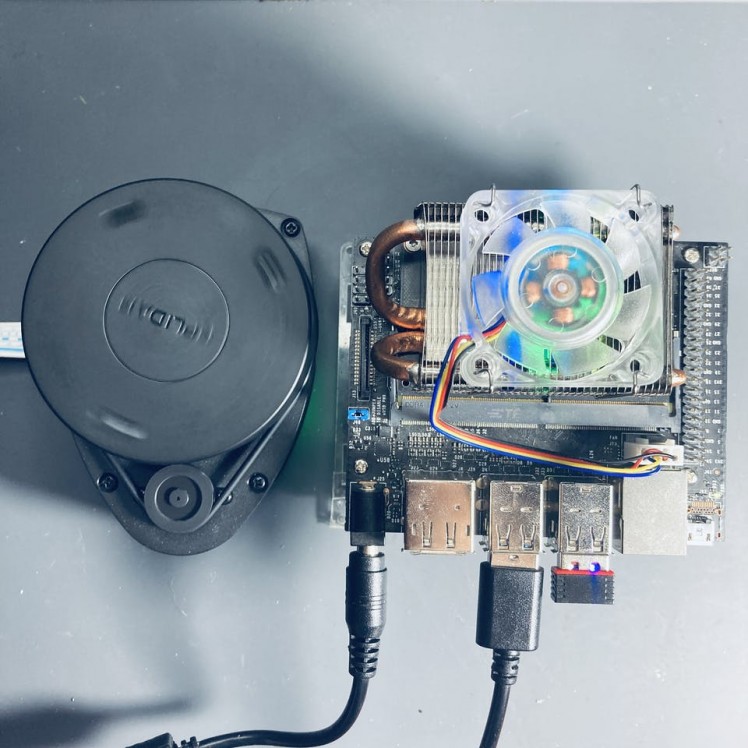
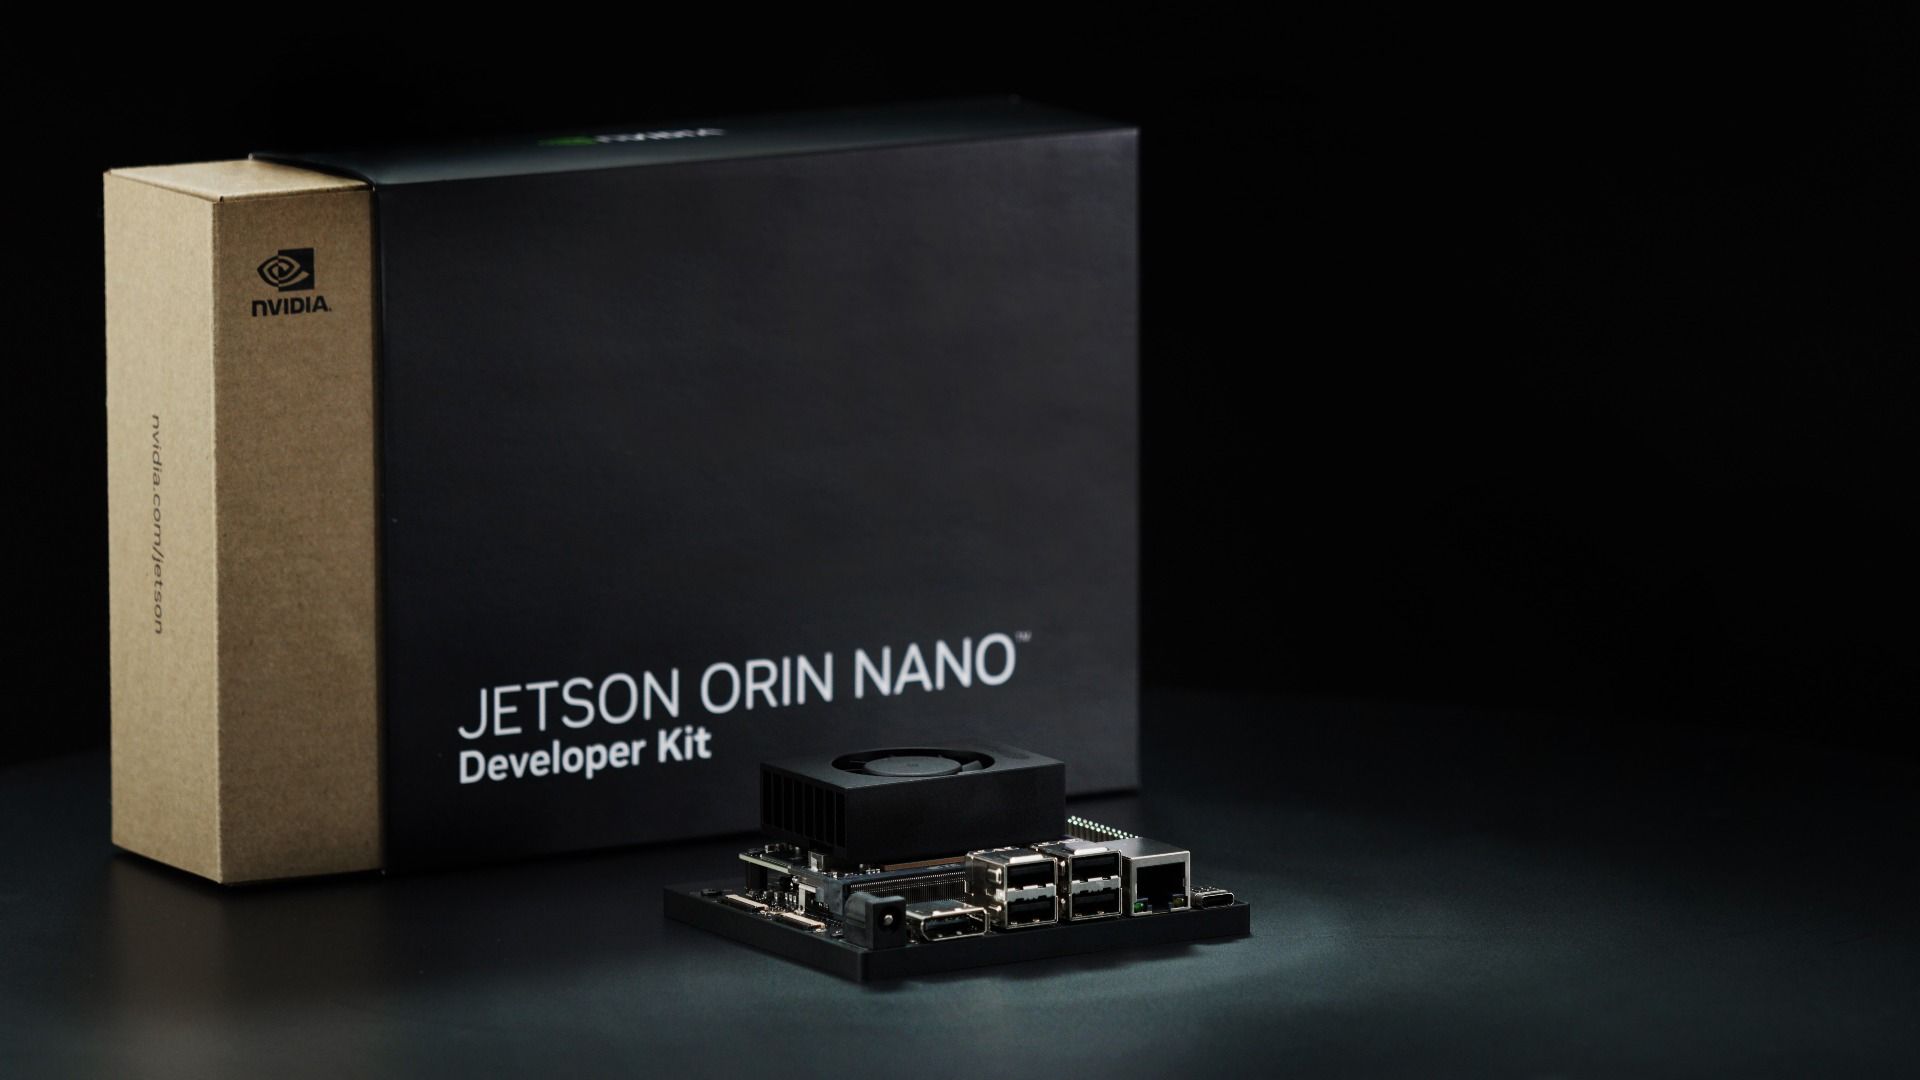
- NVIDIA Jetson Nano Developer Kit
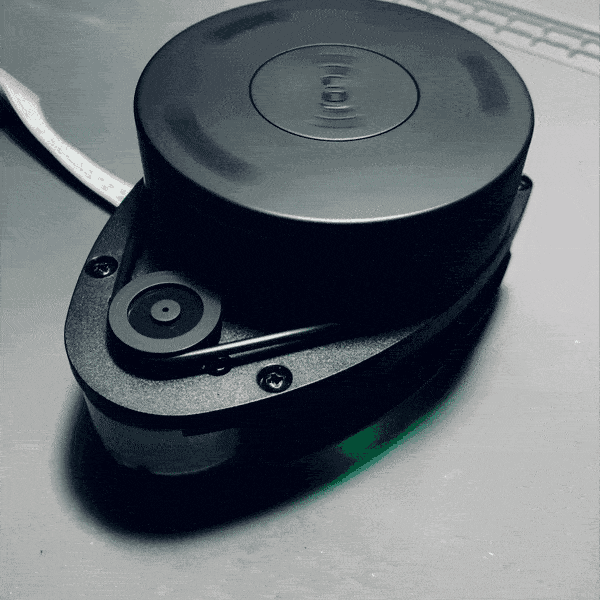
- RPLidar A1M8 with connector. The connector is being used for charging, data transfer and controlling the device.
- 5V 4A Barrel Jack Power Supply
- SD Card (64GB or 128GB)
- USB to Micro-USB cable
- To use a 5V 4A supply you will need a 2-pin jumper. I would strongly recommend to buy a 5V 4A power supply for your Jetson Nano in order to have better performance and run a high-load ROS applications.
- A computer with an internet connection and the ability to flash your microSD card. Here we’ll be using laptop.
- The Jetson Nano Developer Kit doesn’t include a WiFi module, so you have two options. You can either connect your Jetson Nano directly to your laptop using an ethernet cable and then set up a static IP and share your network, or you can add a USB WiFi adapter and connect the Nano to the same WiFi network that your laptop is using. Here we’ll be using a USB WiFi adapter.
- Some experience with ROS build system is helpful but not required.
- Familiar with the Linux command line, a shell like bash, and an editor like nano.
- ROS applications use a lot of compute resources and the heat sink may not be enough for the heat generated. Consider adding a cooling fan. I recommend you use the ICE Tower CPU Cooling Fan for Nvidia Jetson Nano.
LiDAR is an optical device for detecting the presence of objects, specifying their position and gauging distance.
RPLIDAR is a low-cost LIDAR sensor suitable for indoor robotic SLAM(Simultaneous localization and mapping) application. It can be used in the other applications such as:
- General robot navigation and localization
- Obstacle avoidance
- Environment scanning and 3D modeling
RPLIDAR A1 Development Kit contains:
- RPLIDAR A1
- USB Adapter with communication cable
- Documentation
The Micro-USB cable does not included. So, let's get started.
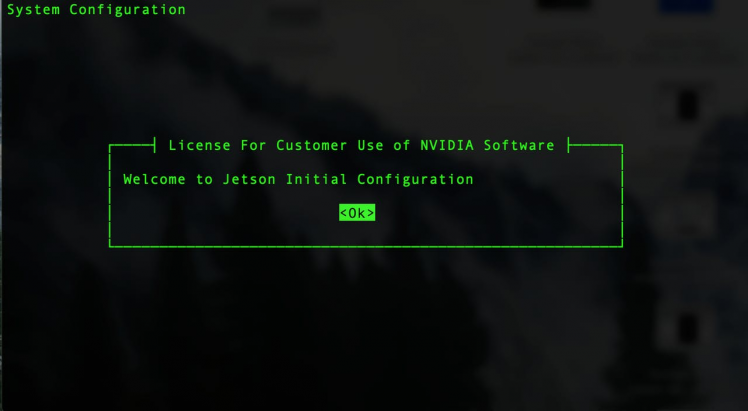
Step 1 - Flash the image to the SD card and boot it upJetPack 4.4 is the NVIDIA stack containing Linux, board drivers and SDKs for GPU, AI and ML processing. NVIDIA calls it's Linux, L4T (Linux for Tegra) and it's currently at version 32.4.2 that comes default with Ubuntu 18.04.
- Download the latest Jetpack image from the official download page.
- Download the etcher tool from the official website.
- Flash the image to SD card
- Insert the microSD card into the Jetson Nano.
- Set the jumper on J48. J48 slot is located between the Barrel Jack connector and the Camera connector.
- Plug one end of the 5V 4A power supply into the barrel jack on the Jetson Nano.
- Oem-config-firstboot can configure the system through the default debugging port. On the Jetson Nano, we access this through the micro-USB connector on the board.
- Plug the USB Cable from your computer into the Jetson Nano
On your standalone computer or laptop, the serial port device name must be determined so that the client software can be used on the correct port. On Windows clients, Open Device Manager in Windows and expand Ports (COM & LPT) to find the port assignment. On Mac OS X and Linux use below command
ls -ls /dev/cu.*A serial client program must be used on your computer to connect via Serial USB connection. The most popular client for Windows is PuTTY, which is free and works well. On Linux and OS X operating systems, the screen program is easily installed and it can also be used to connect to serial ports from a terminal program or system console.
You can install screen on Ubuntu:
sudo apt-get install screenIn a Terminal window run the following command:
screen /dev/cu.usbserial* 115200 -LYou should now see a screen like this:
- The Jetson Nano will then walk you through the install process, including setting your language, username/password, timezone, keyboard layout, wifi setup etc.
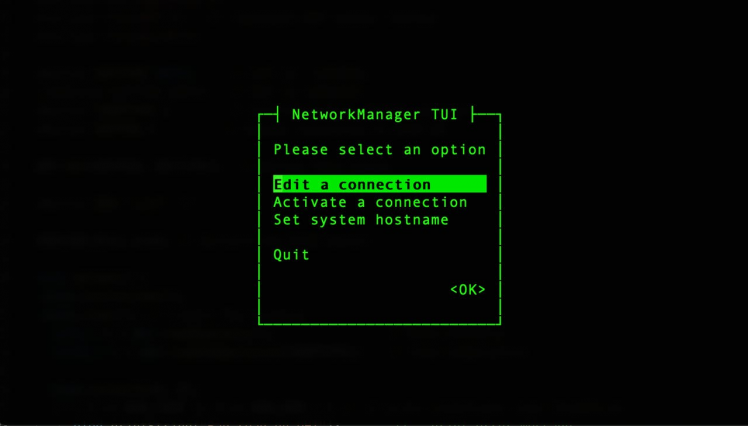
- When trying to setup networking, it can ran into a failure. You can use nmtui command utility to configure your WiFi network.
- After configuration, the system will restart itself.
Network Manager should be installed by default on Ubuntu Desktop installs, as well as most flavours of Ubuntu. mtui is a basic text-based user interface for managing Network Manager. Additionally, you can use nmcli as well. It is a command-line tool for controlling Network Manager and reporting network status.
Run the following command launch the nmtui interface. Select Active a connection and hit OK.
sudo nmtuiExample output:
Select the interface which you want to bring online then hit Activiate button.
A ping test may be done in order to determine the status of your Internet connection.
ping google.comIf it is successful, to connect to your Jetson Nano via your local area network, you will need to know the IP address or the hostname of your device.
You can find out it by running the following command:
Hostname -IThen connect to your Jetson Nano via ssh using the PuTTY terminal window on Windows. Linux, the macOS comes with a command-line SSH client already installed.
Step 4 - Upgrade all installed packages on your JetsonAt this point it’s a good idea to run some updates. You can do that by entering the commands below on the Nano.
sudo apt-get updatesudo apt-get upgradeOnce you are done, you can reboot the Jetson Nano with this command:
sudo reboot nowROS applications use a lot of compute resources and the passive heat sink may not be enough for the heat generated. Consider adding a cooling fan.
Next, we will lock Jetson Nano at its maximum frequency and power mode by running the following commands:
sudo jetson_clocksThis will spin the fan, as well as set the CPU and GPU clocks to their maximum value in the current performance profile.
To force run the fan:
sudo /usr/bin/jetson_clocks --fanTo see the current status:
sudo /usr/bin/jetson_clocks --showOutput:
SOC family:tegra210 Machine:NVIDIA Jetson Nano Developer KitOnline CPUs: 0-3CPU Cluster Switching: Disabledcpu0: Online=1 Governor=schedutil MinFreq=1479000 MaxFreq=1479000 CurrentFreq=1479000 IdleStates: WFI=0 c7=0cpu1: Online=1 Governor=schedutil MinFreq=1479000 MaxFreq=1479000 CurrentFreq=1479000 IdleStates: WFI=0 c7=0cpu2: Online=1 Governor=schedutil MinFreq=1479000 MaxFreq=1479000 CurrentFreq=1479000 IdleStates: WFI=0 c7=0cpu3: Online=1 Governor=schedutil MinFreq=1479000 MaxFreq=1479000 CurrentFreq=1479000 IdleStates: WFI=0 c7=0GPU MinFreq=921600000 MaxFreq=921600000 CurrentFreq=921600000EMC MinFreq=204000000 MaxFreq=1600000000 CurrentFreq=1600000000 FreqOverride=1Fan: speed=255NV Power Mode: MAXNWe want to ensure that these settings will be saved at next jetson boot up. Firstly, we need to install nano editor.
sudo apt install nano -yLet's create rc.local file. Run below command on terminal:
sudo nano /etc/rc.localAdd the following lines to etc/rc.local.
#!/bin/sh -e# rc.local#Maximize performancesecho 1 > /sys/devices/system/cpu/cpu0/online echo 1 > /sys/devices/system/cpu/cpu1/online echo 1 > /sys/devices/system/cpu/cpu2/online echo 1 > /sys/devices/system/cpu/cpu3/online echo performance > /sys/devices/system/cpu/cpu0/cpufreq/scaling_governor nvpmodel -m 0 ( sleep 60 && jetson_clocks && /usr/bin/jetson_clocks --fan )&exit 0And then press CRTL + X and then Y. Now make it executable:
sudo chmod +x /etc/rc.localWhen your Jetson nano has started, your jetson clocks will also start.
Step 6 - Create a swap file(optional)As you know, Jetson Nano has only 4GB RAM, it is not enough to run a high-load ROS applications. Excessive amount of memory would be required for building those packages.
To avoid from memory crashing, we should define swap-space for Jetson Nano. Before we begin, we can check if the system already has some swap space available.
free -hIf your system does not have swap space available, run the below script to add a 4GB swap file.
sudo fallocate -l 4G /var/swapfilesudo chmod 600 /var/swapfilesudo mkswap /var/swapfilesudo swapon /var/swapfilesudo bash -c 'echo "/var/swapfile swap swap defaults 0 0" >> /etc/fstab'And reboot your device
sudo shutdown -r nowAfter reboot, verify it using below command:
free -hLet's get started with installing ROS Melodic on the Jetson Nano.
Step 7 - ROS Melodic package installation and setupThe official steps for installing ROS are at this link, but I will walk you through the process below so that you can see what each step should look like. Installing the Robot Operating System on the Jetson Nano is the same like on the laptop or computer.
Set up the Jetson Nano to accept software from packages.ros.org:
sudo sh -c 'echo "deb http://packages.ros.org/ros/ubuntu $(lsb_release -sc) main" > /etc/apt/sources.list.d/ros-latest.list'If the command succeeds, you won’t see any output message.
By running the following command, we will download the key from Ubuntu’s keyserver into the trusted set of keys:
sudo apt-key adv --keyserver 'hkp://keyserver.ubuntu.com:80' --recv-key C1CF6E31E6BADE8868B172B4F42ED6FBAB17C654Output:
Executing: /tmp/apt-key-gpghome.22OkICzKyz/gpg.1.sh --keyserver hkp://keyserver.ubuntu.com:80 --recv-key C1CF6E31E6BADE8868B172B4F42ED6FBAB17C654gpg: key F42ED6FBAB17C654: public key "Open Robotics <info@osrfoundation.org>" importedgpg: Total number processed: 1gpg: imported: 1Update the packages index:
sudo apt updateNow pick how much of ROS you would like to install. ROS has many different flavors of installations: desktop, desktop-full, ros_core, robot, etc.
- Desktop-Full Install: : Everything in Desktop plus 2D/3D simulators and 2D/3D perception packages
- Desktop Install: Everything in ROS-Base plus tools like rqt and rviz
- ROS-Base: (Bare Bones) ROS packaging, build, and communication libraries. No GUI tools.
I’ll go with installing Desktop Install here.
sudo apt install ros-melodic-desktopIf you plan to use ROS together with the simulator (also includes tools such as rqt, rviz and others):
sudo apt-get install ros-melodic-desktop-fullInitialize rosdep. Rosdep enables you to easily install system dependencies for source code you want to compile and is required to run some core components in ROS:
if you see below error message:
sudo: rosdep: command not foundRun the below command to fix it:
sudo apt install python-rosdepNow initialize rosdep again:
sudo rosdep init rosdep updateIf you are not comfortable with entering environment variables manually each time, you may configure it in a way that it add itself in your bash session on every new shell startup. So, Update your .bashrc script:
echo "source /opt/ros/melodic/setup.bash" >> ~/.bashrc source ~/.bashrcNow the Jetson Nano is ready to execute ROS packages and become the brain of your autonomous robot.
Check which version of ROS you have installed. If you see your ROS version as the output, congratulations you have successfully installed ROS. Run the below command.
rosversion -dIf everything is correct, we will get the following screen:
melodicConnect your RPLiDAR to your Jetson Nano using Micro USB Cable.
Connect your RPLiDAR to your Jetson Nano using Micro USB Cable. Nano is ready to communicate with LiDAR without any additional drivers. Through this connection, we are able to obtain scan data and control speed of scanning.
Once you have connected the RPLiDAR to your Raspberry Pi, type the following command line to check the permissions:
Open your terminal and run the following command.
ls -l /dev | grep ttyUSBOutput of the following command must be:
crw-rw---- 1 root dialout 188, 0 Oct 30 18:10 ttyUSB0Run below command to change permission:
sudo chmod 666 /dev/ttyUSB0Once the permissions are configured, you have to download and install the RPLIDAR ROS packages.
Step 9 - Configure a catkin workspace and installing ROS packages for the RPlidarThe next goal is to create a workspace - a catkin workspace - for our RPLIDAR application and its supplements. The ROS system needs a master, where all devices are registered and where they can publish their data and receive new one from other nodes. Here it will be our Jetson Nano.
Install the following dependencies:
sudo apt-get install cmake python-catkin-pkg python-empy python-nose python-setuptools libgtest-dev python-rosinstall python-rosinstall-generator python-wstool build-essential gitCreate the catkin root and source folders:
mkdir -p ~/catkin_ws/srccd ~/catkin_ws/and source it to bashrc:
echo "source $HOME/catkin_ws/devel/setup.bash" >> ~/.bashrcOkay, we’re ready to start installing RPLIDAR ROS package. Go to the source folder of the catkin workspace that you just created:
cd srcClone the ROS node for the Lidar in the catkin workspace.
sudo git clone https://github.com/Slamtec/rplidar_ros.gitAfter that build with catkin.
cd ~/catkin_ws/Run catkin_make to compile your catkin workspace.
catkin_makeThen run to source the environment with your current terminal. Don't close the terminal.
source devel/setup.bashand launch RPILIDAR launch file
roslaunch rplidar_ros rplidar.launchLet us first look at how raw data from LiDAR look like when they are published on topic /scan. Just follow the steps below.
Listen to the topic /scan:
rostopic echo /scanNow you should be able to see in the terminal the data from the LiDAR sensor.
When you try to use the rviz command by redirecting GUI display using X11 forwarding:
rvizYou will still see the bellow error message:
[ERROR] [1604096487.578234605]: Unable to create the rendering window after 100 tries.[ INFO] [1604096487.578328462]: Stereo is NOT SUPPORTEDterminate called after throwing an instance of 'std::logic_error' what(): basic_string::_M_construct null not validAborted (core dumped)Rviz cannot be started remotely. If you really want to start it, it is better to connect with VNC.
Step 10 - Installing VNC ServerConsidering the limited RAM (4GB) and the fact that many use cases do not require desktop environment, replacing Ubuntu Desktop with a simpler but more memory-efficient one can save you around 1GB RAM. Using lightweight desktop environment reduces the startup memory consumption.
There are a large number of windows managers available for Linux. For a light weight desktop manager for an embedded application you might want to consider Xfce Desktop Environment or Lxde Desktop Environment.
So type the following command:
sudo apt-get install xfce4-goodies xfce4Install LightDM display manager:
sudo apt-get install lightdmWhile installing XFCE, you’ll see a prompt to select your default display manager:
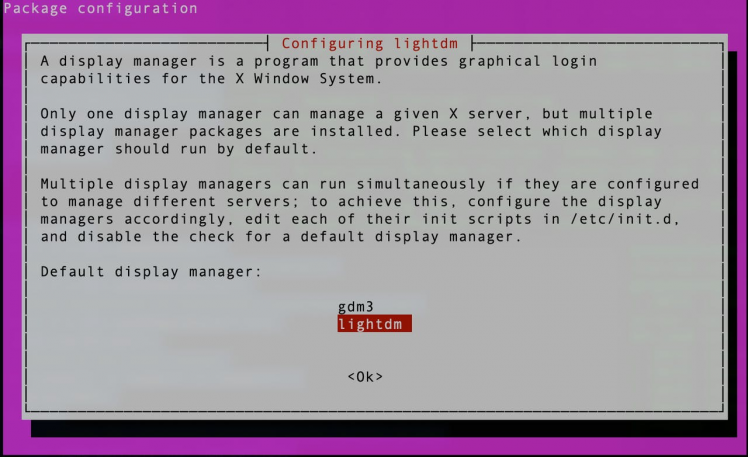
Use the arrow-keys to select lightdm instead of gdm3, press Tab to move to OK, and press Enter.
Then reboot your jetson:
sudo rebootConnect to your jetson via SSH and open a terminal and issue the following
cat /etc/X11/default-display-managerThis will return :
/usr/sbin/lightdmTo enable automatic login – open a terminal and use any text editor for configuration file –lightdm.conf. If the configuration file already exists then edit it. Otherwise, create a new configuration file – lightdm.conf.
sudo nano /etc/lightdm/lightdm.confand, append the file with:
[Seat:*]autologin-user=<user_name>autologin-user-timeout=0user-session=xfceFinally, remove ubuntu-desktop packages
sudo apt remove --purge ubuntu-desktopsudo apt autoremoveThere are also several different VNC servers available in Ubuntu repositories such as TightVNC , TigerVNC and x11vnc . Each VNC server has different strengths and weaknesses in terms of speed and security.
For the server, the easiest for Ubuntu would be X11VNC. It is very simple to install and to use. This program is not only free of charge, open source, but also supports OpenGL programs. For example, rviz and other programs can also open normally.
Open a terminal and run the following commands to update default repositories and install required packages.
sudo apt-get install x11vnc -yNow create a password to connect using vnc viewer from the client system. This will not require any username to connect vnc.
x11vnc -storepasswd /etc/x11vnc.pwdAfter the successful installation of the x11vnc server on your system. Let’s start it using the following command. Change the parameters as per your setup.
sudo x11vnc -forever -loop -noxdamage -repeat -rfbauth /etc/x11vnc.pwd -rfbport 5900 -sharedThe VNC server will start on default port 5900. Leave command prompt running.
Step 11 - Set Up SSH Tunneling on Linux and macOS(optional)VNC is not an encrypted protocol and can be subject to packet sniffing. The recommended approach is to create an SSH tunnel that will securely forward traffic from your local machine on port 5901 to the server on the same port.
If you run Windows, you can set up SSH Tunneling using the PuTTY SSH client.
If you run Linux, macOS, or any other Unix-based operating system on your machine, you can easily create an SSH tunnel with the following command:
ssh -L 5901:127.0.0.1:5901 -N -f -l username@server_ip_addressYou will be prompted to enter the user password.
Do not forget to replace username and server_ip_address with your username and the IP address of your Jetson Nano.
Step 12 - Connecting to VNC server using VNC clientNow that the SSH tunnel is created, it is time to open your Vncviewer and to connect to the VNC Server at localhost:5901.
You can use any VNC viewer such as TigerVNC, TightVNC, RealVNC, UltraVNC, Vinagre and etc.We’ll be using RealVNC. Open the viewer, enter localhost:5901, and click on the Connect button.
Then run below command to adjust the screen resolution of a virtual desktop. Xrandr is used to set the size, orientation and/or reflection of the outputs for a screen.
xrandr --fb 1270x720
Congratulations! We are done with the VNC connection.
Step 13 - Running rviz with VNC on a remote computerOpen a terminal windows and run the following command:
cd ~/catkin_ws/Then run to source the environment with your current terminal.
source devel/setup.bashand launch RPILIDAR launch file
roslaunch rplidar_ros rplidar.launchLet’s check it further with Rviz. Open a new terminal window and run the following command:
rvizYou'll see the rviz window pops out.
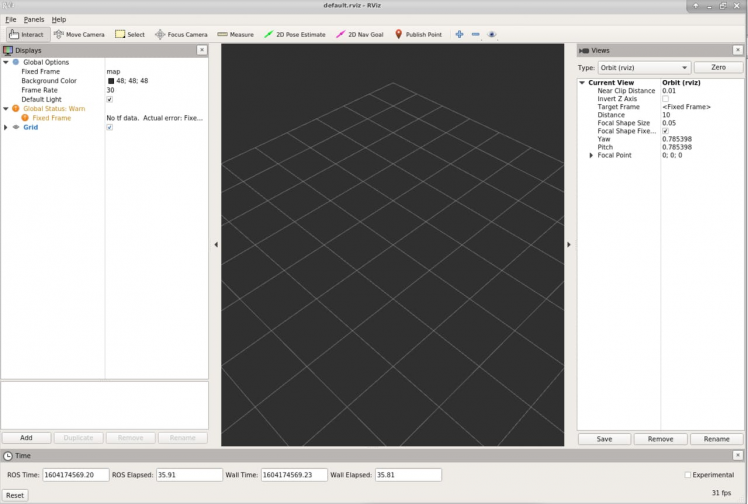
The visualization is not showing due to problems with the frame name. We now need to tell rviz which fixed frame we want to use. Change fixed frame to laser.
To add objects you want to visualize, click Add button located in the left bottom corner of the RViZ GUI and then select LaserScan object, and then set the topic of LaserScan object to /scan. Increase the size to 0.03 to see the laser scan data clearly.
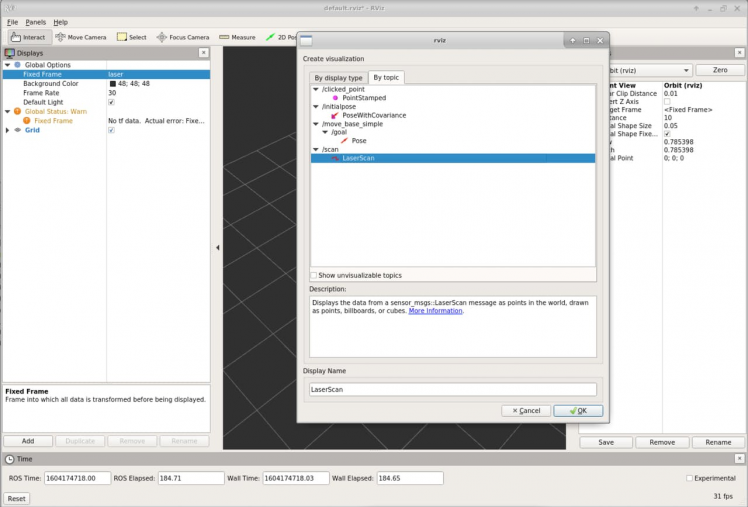
Now you should see the visualization of LiDAR sensor measurements in the RViZ GUI.
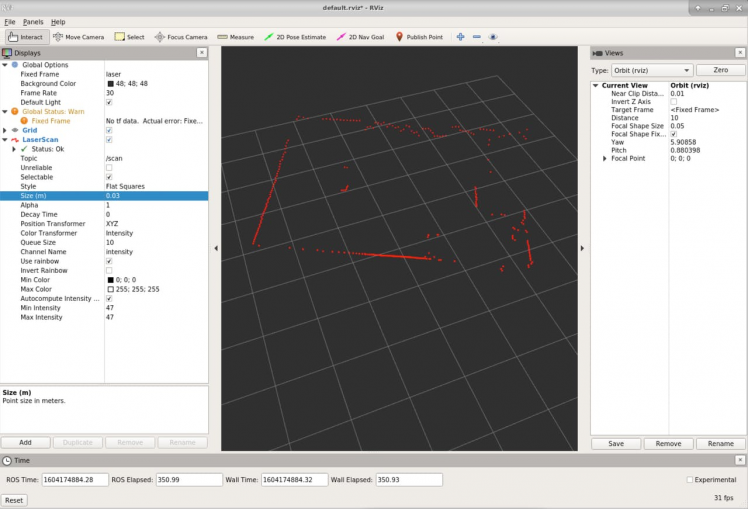
Rviz will open with a map of the RPLIDAR’s surroundings. Alright, so we can visualize the laser scan data using rviz. So now the next step will be to create a map out of it.
Step 14 - How to build a Map Using Hector SLAMWe will now add the mapping functionality to our system. We use the Hector-SLAM package, since it enables us to create maps. A map is a representation of the environment where the LIDAR is operating.
Hector SLAM is a mapping algorithm which only uses laser scan information to extract the map of the environment. The LIDAR uses laser sensor data to create a map of its surrounding using a technique called SLAM – Simultaneous Localization and Mapping. SLAM is an algorithm to create map (mapping) as well as to calculate own position within the map (localization). The Hector SLAM method can be used without odometry. It only needs the data from Lidar and relies on scan matching approach to construct a complete map.
- hector_mapping The SLAM node.
- hector_geotiff Saving of map and robot trajectory to geotiff images files.
The hector-mapping nodes depend on Qt4, so you need to install it first.
sudo apt-get install qt4-qmake qt4-dev-toolsThe hector_slam can be installed like a ROS node of the LIDAR into the src folder of the workspace. Move into catkin_w/src folder:
cd ~/catkin_ws/srcClone the Hector SLAM source files:
git clone https://github.com/tu-darmstadt-ros-pkg/hector_slam.gitSince, we do not have base_footprint and our base_llink will be our odometry frame, there is need to modify two files. Hector SLAM’s launch file which can be found at:
cd ~/catkin_ws/src/hector_slam/hector_mapping/launch/mapping_default.launchModify the below lines:
<arg name="base_frame" default="base_footprint"/><arg name="odom_frame" default="nav"/>replace base_footprint and nav into base_link:
<arg name="base_frame" default="base_link"/><arg name="odom_frame" default="base_link"/>Then, at the end of this file, find out the below line
<!--<node pkg="tf" type="static_transform_publisher" name="map_nav_broadcaster" args="0 0 0 0 0 0 map nav 100"/>-->Modify into:
<node pkg="tf" type="static_transform_publisher" name="base_to_laser_broadcaster" args="0 0 0 0 0 0 base_link laser 100"/>Then go to /catkin_ws/src/hector_slam/hector_slam_launch/launch folder and open tutorial.launch file:
sudo nano tutorial.launchChange the below line:
<param name="/use_sim_time" value="true"/>into:
<param name="/use_sim_time" value="false"/>Open a terminal window and run the following command:
cd ~/catkin_ws/Then run build source
catkin buildThe catkin build command is part of the catkin_tools package. On apt-get the package is called python-catkin-tools.
source devel/setup.bashIf you see below error message
Project 'cv_bridge' specifies '/usr/include/opencv' as an include dir, which is not found.You can resolve the errors with the following command:
cd /usr/includesudo ln -s opencv4/ opencvAnd then run the following at the command line:
roslaunch rplidar_ros rplidar.launchLeave this terminal window running.
Alright we are almost there, now the final step is to launch the above file and see the result in rviz. So let’s do it. Open up a second terminal and start the mapping process using below command:
roslaunch hector_slam_launch tutorial.launchThis launch file starts the hector_mapping node as well as the hector_trajectory_server and hector_geotiff nodes needed for generating geotiff maps.
Now you should be able to see the map in rviz like below:
Completed map of the room in RViz

Completed map of the room in RViz
Hector_geotiff saves the map and robot trajectory to geotiff image files. Run the below command on a new terminal prompt:
rostopic pub syscommand std_msgs/String "savegeotiff"The savegeotiff map can be found in the hector_geotiff/map directory.
Completed map of the room

Completed map of the room
The map is a 2D grid based SLAM map created by the hector_slam library for ROS. It is based on the LiDAR sensor data and an approximative position of the robot.
That’s it for today! You have ROS Melodic installed and generated a map using Hector Slam algorithm.
I hope you found this guide useful and thanks for reading. If you have any questions or feedback? Leave a comment below. Stay tuned!
Resources- RPLIDAR Low Cost 360 degree 2D Laser Scanner (LIDAR)System
- RPLIDAR S1 Low Cost 360 Degree Laser Range Scanner
- Graphics Processing of LiDAR Data
- RPLidar and Hector SLAM for Beginners | ROS Tutorial #8
- How to Install and Configure VNC on Ubuntu 18.04
- JETSON NANO USB LOGIN (A02, B01)
- JETSON NANO HEADLESS WIFI SETUP
- How to Install ROS Noetic on Raspberry Pi 4
- Getting Started with ROS on Jetson Nano
- Installing ROS Melodic on Raspberry Pi 4 and RPLIDAR A1M8
- Graphics Processing of LiDAR Data
Credits
Related products


Leave your feedback...