
A More Realistic Electric Fireplace

About the project
Add some sound FX to your electric fireplace!
Project info
Items used in this project
Hardware components


Story
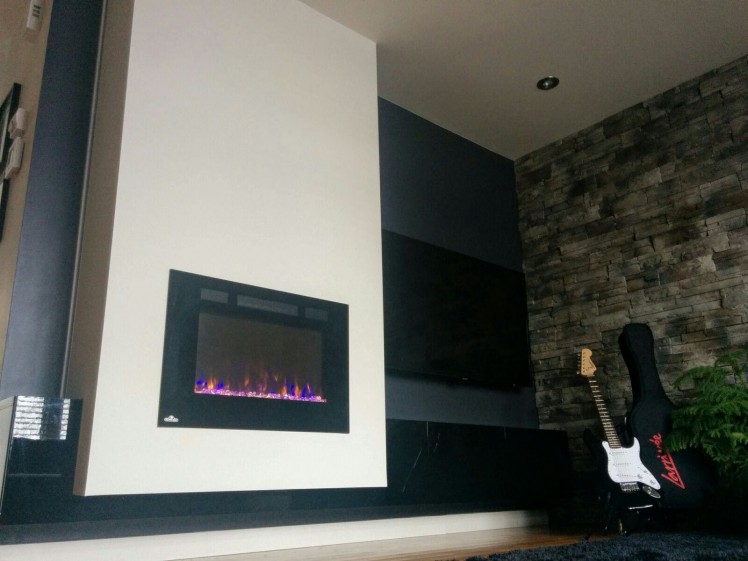
Some time ago we added a magical element to our living room: an electric fireplace.
The feeling and the ambiance it gives to our home is great, I totally recommend you to get one if you were thinking about it.
Now the little detail that this appliance is missing is the sound of fire burning that one hears with real wood and flames.
But hey, let's fix that right now!
Install the fireplace
Install the appliance in your home. Check beforehand the electrical requirements since it may consume some serious power depending on the heating it provides.
These electric fireplaces can be installed by hanging them on the wall or recessed into one, your choice.
It's also your choice to buy one or build your very own as described in this write-up by Ben Eagan.
On my side, I created a box with some 2x4's regularly used in building walls and I finished it with drywall. This is very popular in North America. You'll need some DIY skills or a friend who has them. You can find some guidance here.
I decided to build a box and install the fireplace recessed as shown in the following picture:
; ;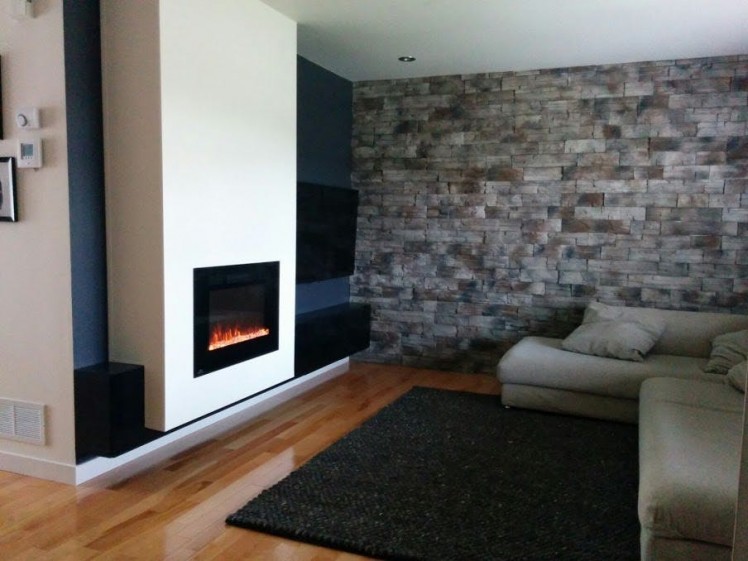 1 / 2 • The fireplace installed
I've added a step by step animation for reference in the second image.
Install the speakers
Right before the fireplace was installed in its final position, I left behind a couple of speakers plugged into a Raspberry Pi:
; ;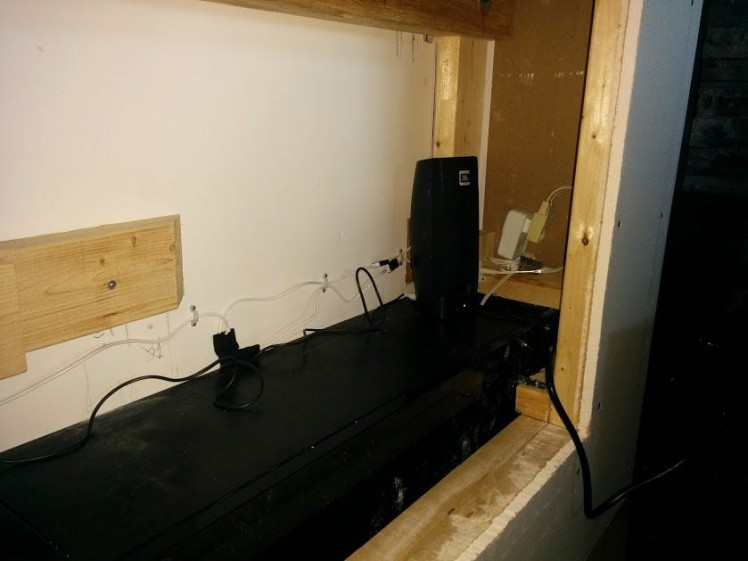 1 / 2 • Powered speaker connected to a Raspberry Pi
In my case I used a Rasp Pi 1 that I had around with a wifi usb adapter. You can use any Raspberry Pi in this project I believe.
Connect the Pi to the Particle Cloud
In case you did not know you could add your Raspberry Pi to the Particle Cloud read this blog post.
Please follow the instructions here. As soon as you finish converting your Raspberry Pi into a Particle Pi, it becomes one of your Particle devices (in case you have Photons, Electrons, Bluz(es), ReadBear Duos, etc).
Choose your special effects
I chose to download the mp3 of a Youtube video like this one:
Nice fire sounds!Convert that video to mp3 and upload it to your Raspberry Pi under /home/pi/fire.mp3
The Blynk app
To easily control the sound effects and volume, I created a Blynk app. Don't know Blynk? You are missing out on something big!
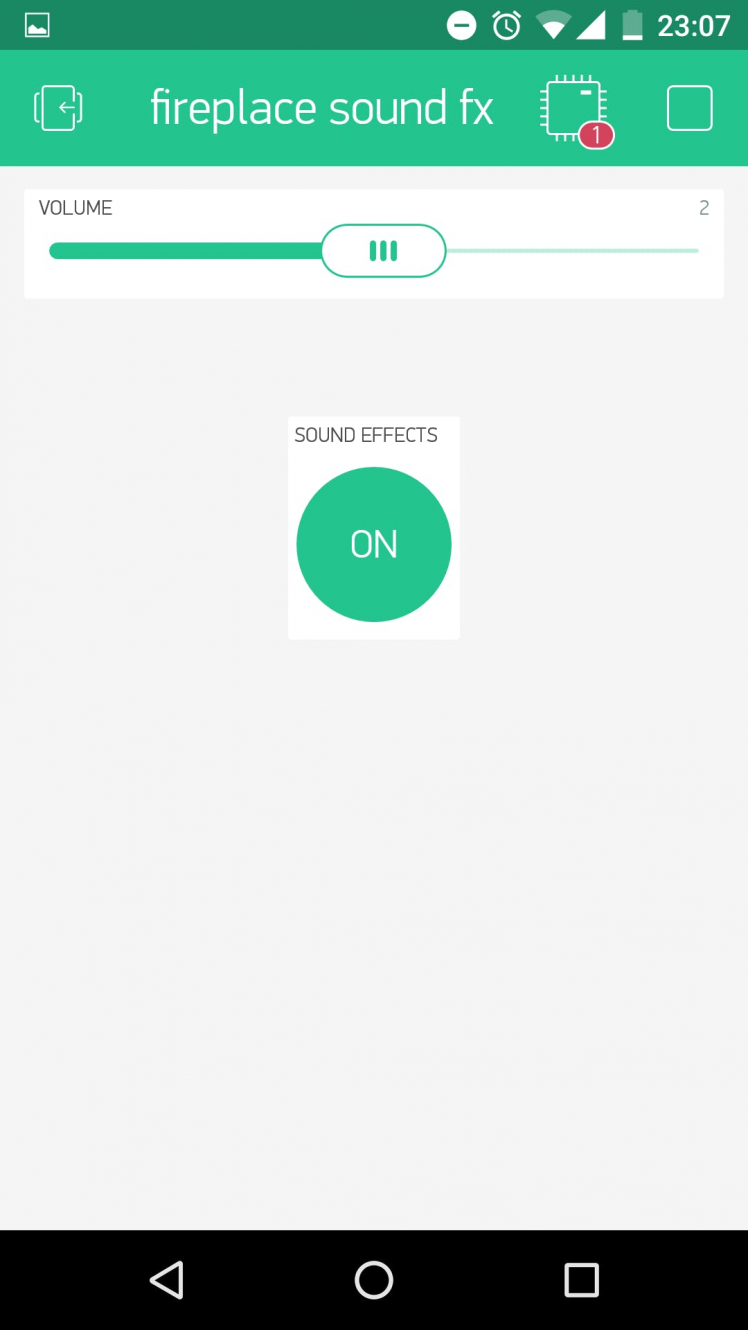 Fireplace sound FX Blynk app
To load the FX app scan this QR with your Blynk Android or iOS app:
 Blynk QR
or open this link on your phone:
Blynk Getting Started instructions are here in case you need to read a bit.
NOTE: if you receive an error while scanning it with your iPhone it may be due to an incompatibility between projects created with Android and iOS. Not much to do here...
Flash the Particle Pi
You are now ready to flash the firmware of your Particle Pi.
Grab the software I attached below, or click on this shared Particle app link, and flash it to your Particle Pi.
NOTE: Don't forget to select your Particle Pi while building on Particle Build or your will receive compilation errors!
If you are using Visual Studio Code as I previously documented in this write-up (totally awesome development environment), change the compile task definition in the file YOUR_PRJ_PATH/.vscode/tasks.json by changing photon for pi:
"args": ["pi", "${workspaceRoot}", "--saveTo", "${workspaceRoot}/firmware.bin"],
Let it play
Once the Pi has loaded the firmware, the mp3 is in the right place and the stars align in your favor, you can start the sound effects.
I have hard coded three levels of volume, but feel free to tweak them to your liking:
    volumeLevel = "-1800";
    volumeLevel = "-1000";
    volumeLevel = "-1";
You can find more info about setting the volume on omxplayer here.
The test drive
Wait for a cold night (or a very cold winter streak like the one we suffered last week - lowest temperatures recorded in the last 146 years!), grab two glasses of red wine, invite your better half, sit together by the fireplace and turn the fireplace and the sound effects on. Close your eyes and relax!
 I can now hear logs burning...
Next steps
If you remember my Infrared replicator you will be able to figure out what is going to be my next move with this fireplace remote:
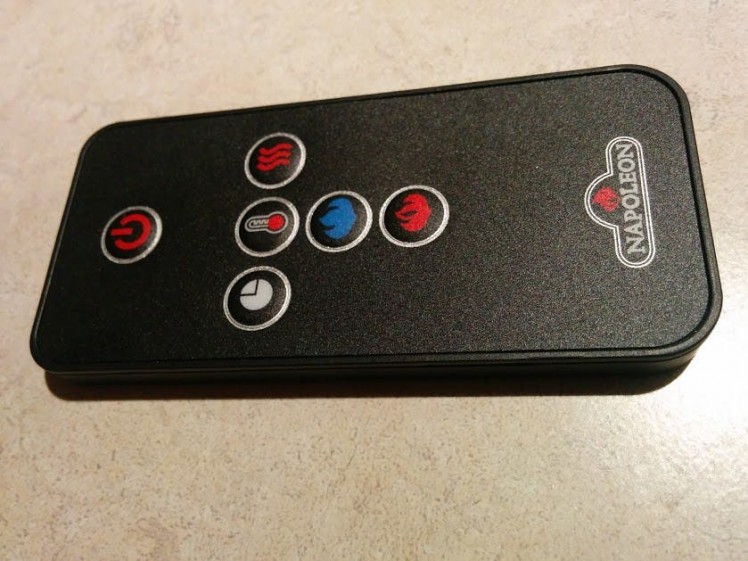 Automating/Blynk'ing this guy is one of my next projects... coming soon!
Need help?
If you require professional help with your projects, don't hesitate to write me a line about your needs at gusgonnet@gmail.com. Thank you!
Code
Credits
Related products


Leave your feedback...