
The Wheel Of Fortune
Made by SimonB / Games & Gaming / Lights / Sensors
About the project
The Wheel of Fortune - Rasp.io InsPiRing, Pimoroni Skywriter, Pi Zero and Python
Project info
Difficulty: Moderate
Platforms: Raspberry Pi , Pimoroni
Estimated time: 4 hours
License: GNU General Public License, version 3 or later (GPL3+)
Items used in this project
Hardware components


Story
I backed the RasP.iO InsPiRing in April 2017 on Kickstarter. It’s a system of RGB LED boards using APA1O2C / SK9822 LEDs by Alex Eames.
The InsPiRing was available as a stick with eight LEDs, a triangle with 24 LEDs or circle with 24 LEDs. I backed the circle insPiRing because I’d always liked the look of the neopixel rings from Adafruit. It’s a 10cm diameter circle. It came with a pHAT-sized driver board for the Raspberry Pi which makes it nice and easy to start with.
There’s a small amount of soldering involved. You need to solder the header onto the pHAT and also solder the IC (an integrated circuit from Texas Instruments) (a quadruple bus buffer gates with three-states outputs) and two four-pin headers.
The ring joins with the pHAT by four wires. Just plug it in and power up the Pi, in my case I have it attached to a Raspberry Pi Zero W. The code is available on GitHub at github.com/raspitv/raspio-inspiring . Just download this on to your Pi into a folder, and it includes the Apa.py class and some basic examples.
The LEDs are controlled using SPI (Serial Peripheral Interface) and Alex has included a Python class for Raspberry Pi use which makes it simple to use out of the box.
I had assembled mine, but then it sat in my ‘to be finished’ project pile for a couple of months. Recently I heard someone at work say about making an electronic wheel of fortune with an LED ring and as I had one sat at home already built I thought I’d give it a go at the weekend.
Wheel of Fortune
To get started I thought I’d better make a single point of light travel around the ring, lighting each LED in sequence. I created a for loop to figure out how to make the pointer spin. This was fairly simple to achieve with just five lines of code in the for loop.
rotation.py
- import time
- from time import sleep
- import apa # RasPiO InsPiRing driver class
- numleds = 24 # number of LEDs in our display
- ledstrip = apa.Apa(numleds) # initiate an LED strip
- print ('Press Ctrl-C to quit.')
- try:
- while True:
- for led in range(numleds): # start single rotation loop
- ledstrip.led_set(led, 10, 0,0,255) # red pointer led
- ledstrip.write_leds() # writes values to leds
- time.sleep(0.02) # framerate or speed
- ledstrip.zero_leds() # zeros led values but does not write the values
- finally:
- print("ALL LEDS OFF")
- ledstrip.reset_leds()
While this created a single rotation on repeat, what I really needed was a single spin made up of multiple rotations that came to a stop in the same place. This required a for loop within a for loop:
spin.py
- rotations = 5
- for rotation in range(rotations): # rotations in one spin
- for led in range(numleds): # start single rotation loop
- ledstrip.led_set(led, 10, 0,0,255) # red pointer led
- ledstrip.led_set(led-12, 10, 255, 0, 0) # blue decoration led on opposite side B,G,R
- ledstrip.write_leds() # writes values to leds
- time.sleep(0.02) # framerate or speed
- ledstrip.zero_leds() # zeros led values but does not write the values
- time.sleep(1.0)
The next task was getting it to stop on a designated point, which would later become the winning or losing position, rather than the zero position. At the moment this would be a chosen number, say six for this example. I changed the number of LEDs to six on the last loop, so within my spin for loop, I created an if statement.
If it’s on the last spin, I set the number of LEDs to six. This has the desired effect of stopping on the 6th LED but then, very importantly, I have to reset the number of LEDs to 24 inside the while loop to make sure that the next spin starts off with full rotations.
spin-stop.py
- numleds = 24 # reset to 24 after stopping at chosen
- rotations = 5
- for rotation in range(rotations): # rotations in one spin
- if rotation == rotations - 1: # on last rotation of the spin stop at chosen led
- numleds = 6 # stop at 6th led
- for led in range(numleds): # start single rotation loop
- ledstrip.led_set(led, 10, 0,0,255) # red pointer led
- ledstrip.led_set(led-12, 10, 255, 0, 0) # blue decoration led on opposite side B,G,R
- ledstrip.write_leds() # writes values to leds
- time.sleep(0.02) # framerate or speed
- ledstrip.zero_leds() # zeros led values but does not write the values
- time.sleep(1.0)
Unless you want to get into game fixing the program needs to randomly generate numbers. The Random module for Python does this with additional functions to allow for an element of control. First of all we need to import Random module at the top of our script.
I created 3 variables: spin, winningnumbers and losingnumbers, the latter two being Python lists. I then defined a function called selectwinner(spin) with one parameter being spin. It chooses either a winner or loser based on modulo of a number equalling zero. Using the formula if spin % 10 == 0: would result in a winner every 10 spins.
However, obviously, I need it to be impossible to predict when a winner will be chosen. So rather than a static number of 10, the script selects a random number between nine and 11. This ensures randomness but it will average out to one in every 10 wins. These numbers can be adjusted to increase/decrease randomness or increase/decrease the chance of a winner being chosen.
An interesting thing to point out is that the script first chooses whether it is a winning or losing spin. Only then does it select at random the number from the python list defined with winning and losing numbers. This is particularly useful for easily changing the winning and losing numbers at the top of the script.
The function returns a python dictionary - this enables me to return multiple values to use. At this stage I’m just returning numleds - the chosen number. Later I add in a LED colour value for winner or loser.
- def selectwinner(spin): # function for choosing winner
- winningspin = random.randint(3, 7) # randomisation of average winning spin
- if spin % winningspin == 0:
- numleds = random.sample(winningnumbers, 1)
- numleds = numleds[0]
- else:
- numleds = random.sample(losingnumbers, 1)
- numleds = numleds[0]
- winner = {
- "number":numleds,
- }
- return winner
Next, I wanted the LED animation to look like a natural spin. This required two things; randomising the number of rotations in a spin between a maximum and minimum number defined at the top of the script and adding a decay into the loop that increases the time for each iteration, so the spin slows down logarithmically.
I use the equation rotation/decay to give a time delay. The time delay increases after each LED and increases for each rotation. This double factor gives a logarithmic scale.
If the number of rotations in the spin is 10 and the ring has 24 LEDs, then the decay equals 240.
So the equation goes:
Rotation / Decay = Time Delay
1 / 240 = 0.00416
1 / 239 = 0.00418
1 / 238 = 0.00420
…
…
1 / 216 = 0.00463
2 / 215 = 0.00930
2 / 214 = 0.00934
2 / 213 = 0.00939
…
…
2 / 192 = 0.01041
3 / 191 = 0.01570
3 / 190 = 0.01579
…
...
This creates a logarithmic scale that starts very fast and ends slow, looking very natural. The jump in time on each rotation isn’t apparent when viewed.

ring.py
- while True:
- rotations = random.randint(minrotations, maxrotations) # randomised number of rotations in this spin
- numleds = 24 # reset to total number of leds after changing to chosen winner or loser
- decay = rotations * numleds # total number of leds in this spin - although more as last rotation is less
- spin += 1 # spin number going up each loop
- for rotation in range(1,rotations): # start spin - multiple rotations loop
- led_colour = [255,255,255] # default led colour B,G,R
- led_stop_colour = [255,255,255] # reset to default colour B,G,R
- if rotation == rotations - 1: # on last rotation of spin select winning number
- winner = selectwinner(spin)
- led_stop_colour = winner.get("led_colour") # colour of winner or loser
- numleds = winner.get("numleds") # chosen winning or loser number
- for led in range(numleds): # start single rotation loop
- if led+1 == numleds: # if the last selected led - winner or loser
- led_colour = led_stop_colour # changes colour based on winner or loser
- ledstrip.led_set(led, brightness, led_colour[0], led_colour[1], led_colour[2]) # pointer led
- ledstrip.led_set(led-15, brightness, 255, 0, 0)
- ledstrip.led_set(led-14, brightness, 128, 0, 0)
- ledstrip.led_set(led-13, brightness, 64, 0, 0)
- ledstrip.led_set(led-12, brightness, 32, 0, 0) # decoration leds on opposite side B,G,R
- ledstrip.led_set(led-11, brightness, 64, 0, 0)
- ledstrip.led_set(led-10, brightness, 128, 0, 0)
- ledstrip.led_set(led-9, brightness, 255, 0, 0)
- time.sleep(rotation/decay) # creates log style increasing time delay
- decay -= 1 # increases time delay per led
- ledstrip.write_leds()
- ledstrip.zero_leds()
- time.sleep(5.0) # infinite loop pause between spins
I’ve called the full script ring.py, it has a while True loop that runs forever with a five-second delay between each spin. For a real-world application, this can easily be replaced with a button press to set off a spin.
The examples discussed above and ring.py can be found on my GitHub page https://github.com/simonbugler/wheel-of-fortune
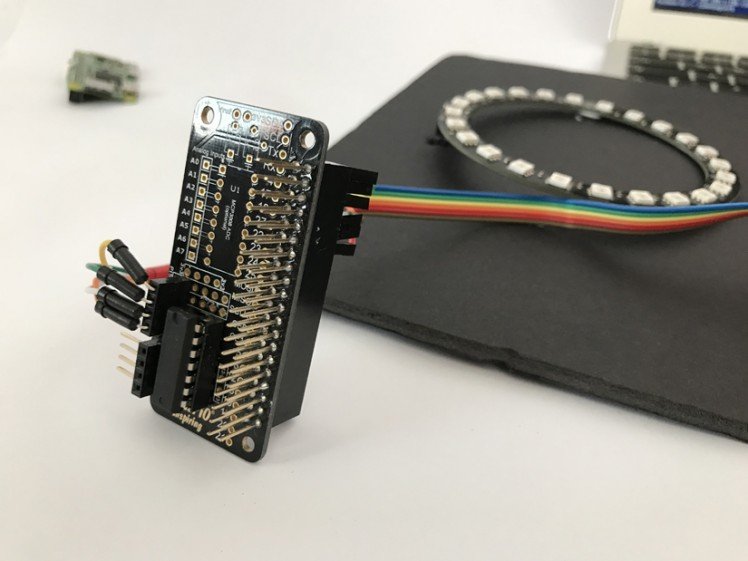
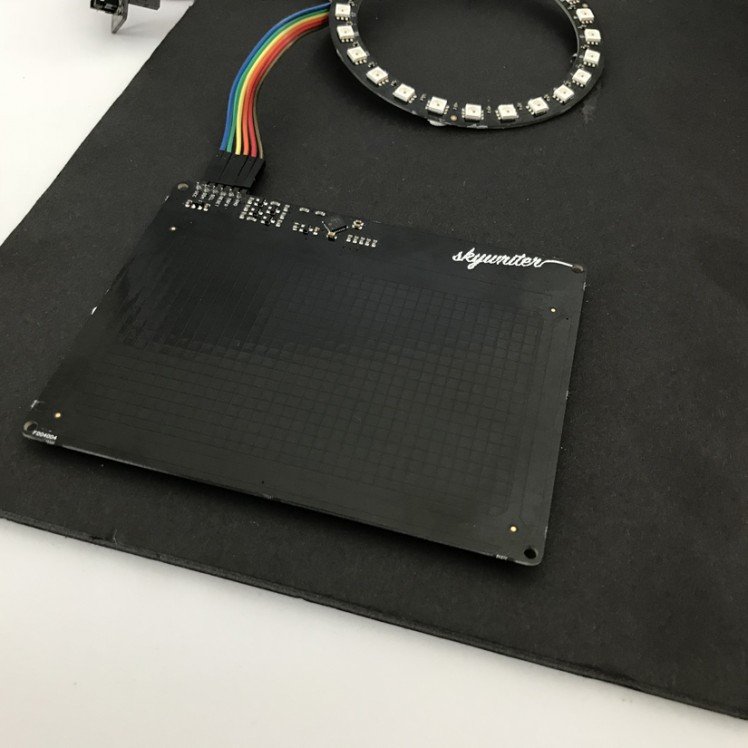
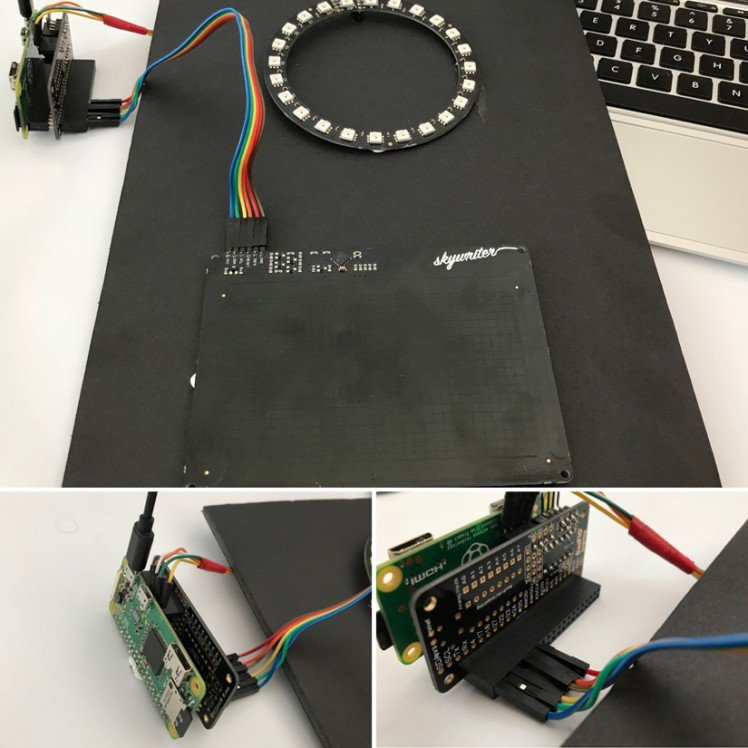
This effectively completes the wheel of fortune but to push it a bit further and make it more fun for users I added a touchless swipe to set the spin going using a Pimoroni Skywriter. The Skywriter adds 3D gesture sensing by detecting positional data (x, y, z) and common gestures like flick left, tap, and double tap. It is incredibly sensitive and can sense gestures from up to 10cm away. It can even be mounted behind a sheet of non-conductive material, like acrylic or fabric, and be completely hidden inside a project.
 Full features of the Skywriter board are
Electrical near-field 3D/gesture sensing
Senses from up to 10cm away
Full 3D position data and gesture information (swipes, taps)
3V3 or 5V compatible, all signals level shifted
Comes with 4 non-slip rubber feet and strip header to solder yourself
Dimensions 94mm x 122mm
Mounting holes
Full Python (for Raspberry Pi, all versions) and Arduino libraries.
I soldered a six-pin right-angle header onto the Skywriter to give it a flat profile and six jumper wires, male to female, connected it very neatly to the Pi, using the physical pins 1, 3, 5, 9, 11 and 13. Then I used the Pimorini one-line installer here https://github.com/pimoroni/skywriter-hat
Also on the GitHub page you will find the library and examples. The function reference can be found here http://docs.pimoroni.com/skywriter/
I duplicated my complete code from ring.py into a file called flick.py and made the main bulk of the script a function called startspin(). The code had to be adapted to allow the user to flick either way and to spin the LEDs respectively. This was quite a challenge and, if you are interested, I suggest you look at the code as it involves three sets of if/elif statements to alter the startspin function based on the swipe direction delivered to the function from the skywriter class.
The @skywriter.flick() detects the flick and triggers the startspin() function. However, I noticed a problem that the Skywriter class keeps listening for flicks and will continue to run the function over and over for flicks it detects while a spin is in progress. To overcome this, I made it first look for a double tap using @skywriter.double_tap and only then run the startspin() function based on the flick. It still isn’t perfect, but corrects the problem sufficiently. A neater solution would require some work on the skywriter class, adding a method to stop or pause in looking for events. This is something that has been requested on the Pimoroni forums and they have said they will add it as time permits.
All my code is on my Github account below. It has been a great little project and I would like to make a housing for it as the gesture control is quite magical when hidden behind a surface.
Code
Credits
Related products


Leave your feedback...