
How To Make A Twitter Selfie Machine
Made by biglesp / Productivity / IoT
About the project
Social media is a solid platform for publicity and promoting your brand. More and more people are using it to create movements, and followers flock to popular accounts. But how can we create interesting content for our followers?
Project info
Difficulty: Moderate
Platforms: Raspberry Pi
Estimated time: 4 hours
License: GNU General Public License, version 3 or later (GPL3+)
Items used in this project
Hardware components


View all
Hand tools and fabrication machines
Story
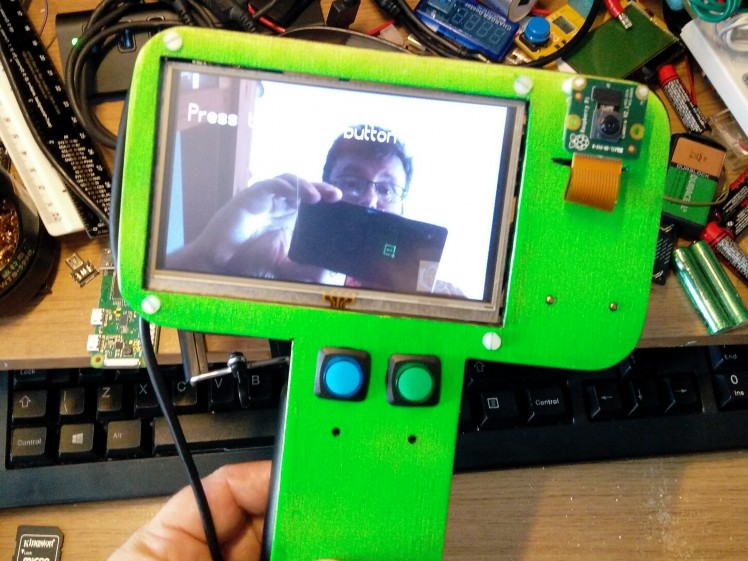
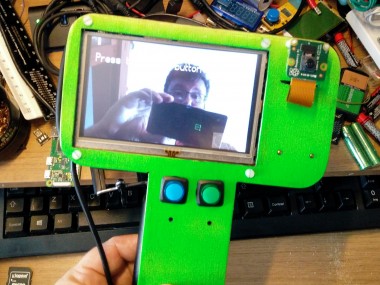
Social media is a solid platform for publicity and promoting your brand. More and more people are using it to create movements, and followers flock to popular accounts. But how can we create interesting content for our followers? Well, one way is to post pictures, and in this tutorial, we shall create a Twitter Selfie Machine, a handheld device with a camera and a screen which we can use to take selfies, group pics, etc. and post them directly to Twitter. This is all thanks to the Raspberry Pi Zero W and some Python code.

To build your own version of this project, you will need:
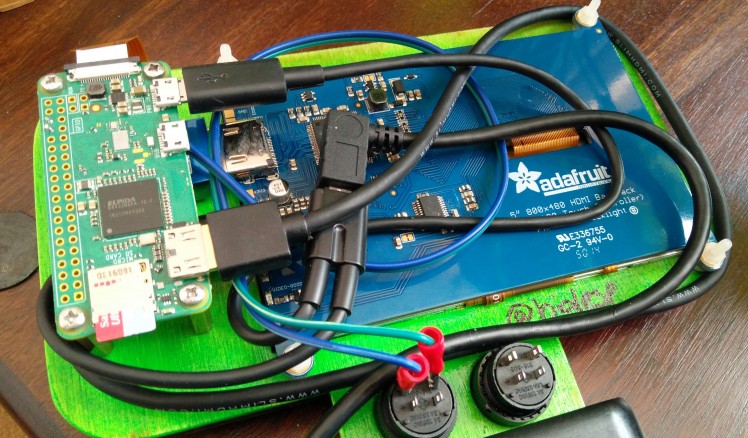
A Raspberry Pi Zero W
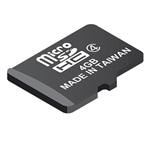
The latest Raspbian on micro SD
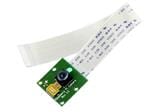
A Raspberry Pi Camera and adapter for Pi Zero.
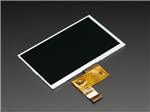
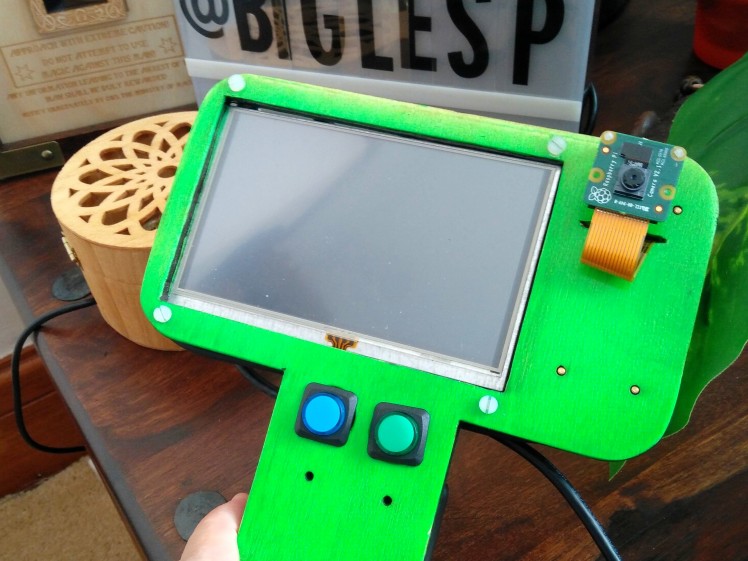
Adafruit 5” 800 x 480 screen.
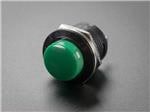
1 x Adafruit pushbuttons.
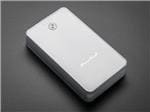
USB battery pack (we used an Anker 10000 mah.)
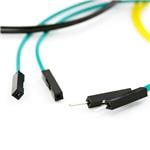
2 x Male to female jumper wires.
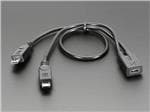
Micro USB splitter (1 to 2 connections)
8 x M2.5 standoffs
12 x M2.5 machine screws
4 x M2.5 nuts
Double-sided adhesive tape
A computer on the same network at the Pi Zero W
To build the frame we used the K40 laser cutter which we have used in a few other projects. We designed a frame using Inkscape, based on a cardboard prototype, which was used to get rough measurements for hand size, and component placement.
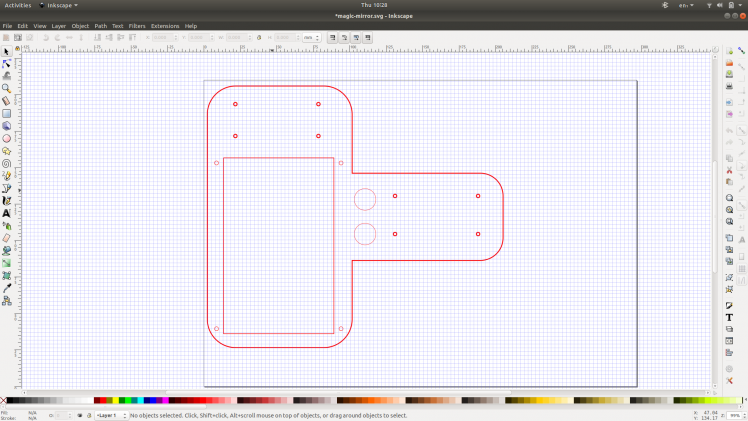
As we can import the Inkscape SVG file directly into the laser cutter software (K40 Whisperer), it makes for an ideal workflow. For the first test we cut out the frame using cardboard on the laser cutter (watch it like a hawk, as cardboard is flammable and fire is bad!) The test fit worked quite well, a few issues occurred chiefly our screen cut out was 2mm too small, but we did measure it correctly, honest! As always with laser cutting and any form of CNC machinery, your measurements must be exact, but you must also take into account that your cutting device may have tolerances. In this case, we needed to increase the size of the screen cut out by 2mm. Your first cut frame is never the final product, treat it as a draft.
Once the frame was cut, we still had to file away a little of the wood around the screen cutout; then we used a Dremel tool to sand the cutout smooth.
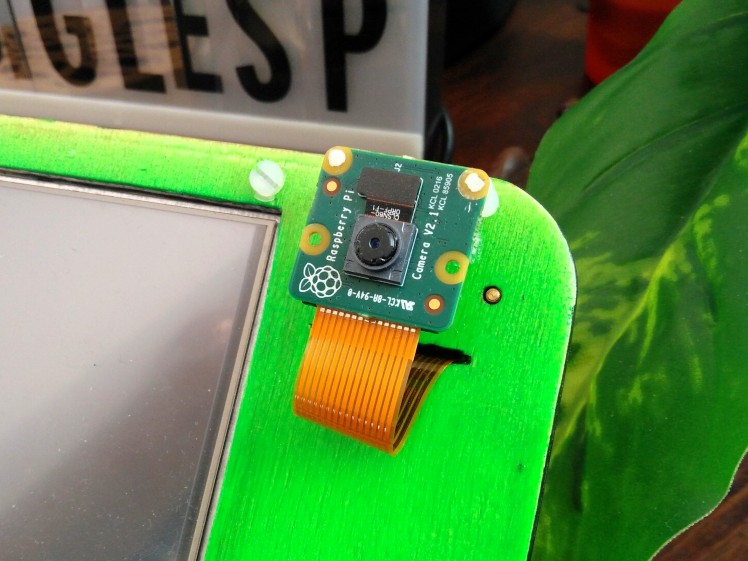
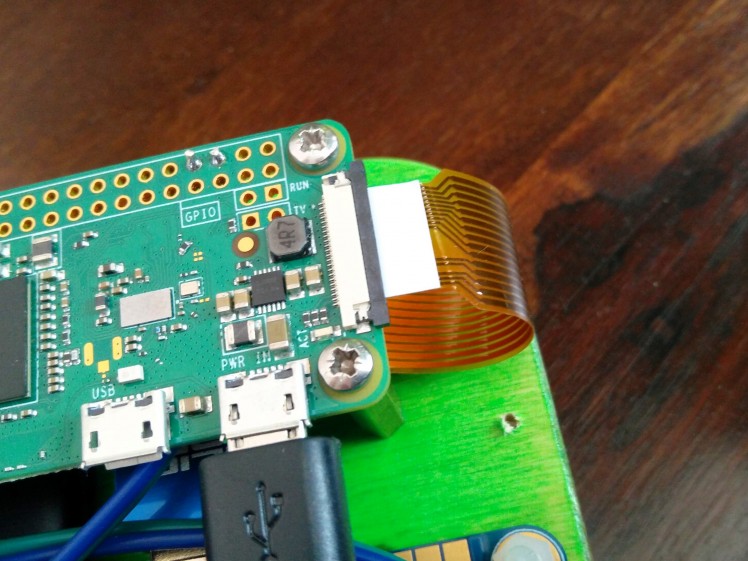
We also noticed an issue, and that was the lack of a slot for the camera flat flex cable to slip through … DOH! No problem though, we just attached a cutting wheel to our Dremel and cut a slot where needed, and used some modelling files to enlarge the slot and smooth everything out as the flat flex cable is rather delicate.
Still in the early stages, but we next test fit all of the components, as we can make minor changes before applying any final finishes. The test fit worked well apart from the battery section in the handle of the frame. We had designed the handle area to accommodate a typical USB battery but then learned that it did not power the unit for very long. So we had to use the Anker 10000 USB power bank, and rather than a cable tie it to the handle, we opted to use some 3M double-sided adhesive, which has proven to be more than adequate to hold the battery in place, in fact, we can’t get it off!
The next stage was to sand the entire frame, to remove the “burnt edges” of the laser cutting process, and to prepare the wood for painting. We used a coarse paper on the edges, ensuring that we kept the straight lines by placing the paper flat on a workbench and running the edges over the paper. For the corners, we rubbed the edges by hand. For the front and back of the frame, we used fine sandpaper to roughen up the wood for painting.
We used dollar store/pound shop paints for the frame, chiefly a neon green spray paint. Applying light coats and sanding in between each coat, we had the frame painted and ready in half a day. Just for added protection we also applied a few coats of lacquer to ensure the paint lasted.
Software Installation
Adafruit Screen setup
The Adafruit screen for this project has a specific screen resolution and that means we need to edit the config.txt file found in the Boot partition of the Raspbian micro SD card. You can edit this file on any computer. Insert the card and open the config.txt file in a text editor.
The first line to edit is
- #hdmi_force_hotplug=1
Change this to
- hdmi_force_hotplug=1
And then at the end of the file, we need to add the following lines to enable the correct resolution.
- hdmi_group=2
- hdmi_mode=87
- hdmi_cvt=800 480 60 6 0 0 0
- hdmi_drive=1
Save the file and safely eject the card from your computer and place it in the micro SD card slot of your Pi Zero W.
Network Setup
Setup your Pi Zero W so that it is attached to a monitor, with a USB keyboard and mouse. Also, connect the official camera to the connector on the side of the Pi Zero W. Always do this while the Pi is off as the camera is very sensitive. Power up your Pi Zero W and wait for the Raspbian desktop to appear. From the Raspbian desktop, setup your WiFi connection using the Networking menu in the top right of the screen. Once complete navigate to the main menu, the menu with a Raspberry logo in the top left of the screen. From this menu go to the Preferences menu and select Raspberry Pi Configuration and then set SSH to enabled, this will allow us to remotely edit the code for the project. Also, change the Interfaces option so that the Pi camera is enabled. Close the configuration tool and open a Terminal. We need to know the IP address of our Pi, so that we can SSH (remotely control it) and find that we need to enter the command.
- $ hostname -I
Make a note of your IP address!
Reboot your Pi to ensure all of the changes have been made.
Attach a button
 As you can see on our unit, we placed two buttons in the frame, the second was for a video snapshot mode, which was never implemented.
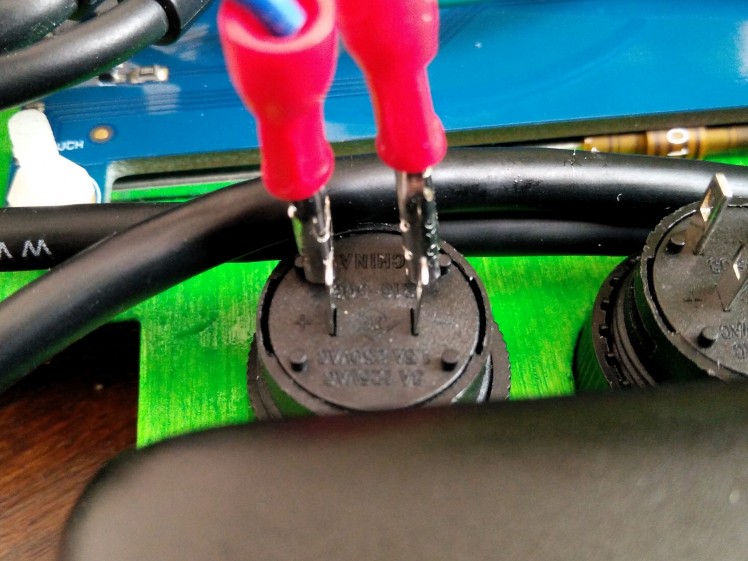
To trigger the camera to take a picture we need to connect our push button to GPIO 14 and GND. We used crimp terminals to create a physical connection that can be easily removed. These were then connected to the GPIO using the female connectors. You can purchase push buttons that have screw terminals which will hold the male connectors in place. Of you can solder the connectors.
The Python software for this project is something that we reused from an earlier project, namely a Raspberry Pi Photobooth project created by Ben Nuttall (the Raspberry Pi Foundation’s Community Manager) as a way for Raspberry Jam events to post pictures on to Twitter using a fun prop for the 2018 Birthday Bash.
You can find the original software, created by Ben at the Github repository for this project.
With your Raspberry Pi booted and at the desktop, open a Terminal and type the following command to install the photobooth software, and setup your Pi to run the code at boot. Please note that this code will force your Pi to reboot once completed.
- $ curl -sSL http://rpf.io/jampb | bash
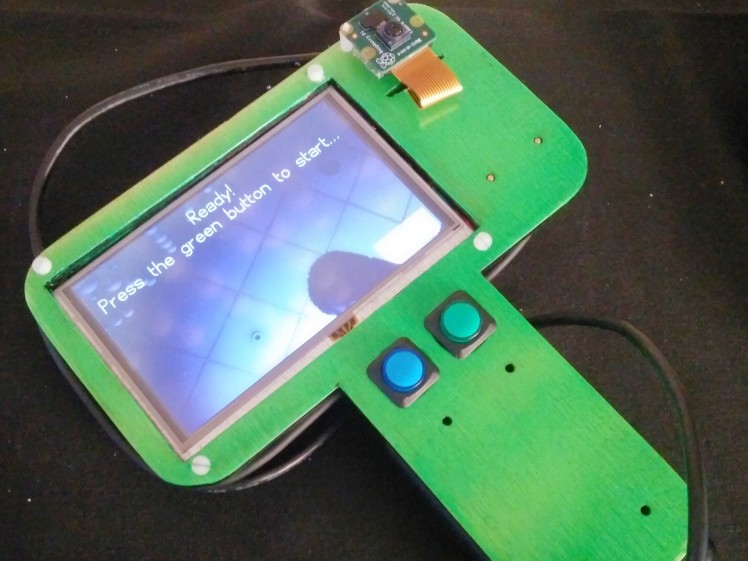
Once the install is complete, your Pi will reboot and run the photobooth software for the first time. Press the push button connected to GPIO 14 to trigger the camera to work! At this time it will take pictures, but not tweet them as we need to do a little work.
Altering the files via SSH.
With the photobooth code running on the Pi Zero W, we can’t really edit the code that powers it. So we shall use another computer to connect to our Pi Zero W and edit the code. If you are using a Mac or Linux machine, then you can do this from the terminal, simply open the terminal and type the following. Oh and remember the IP address for your Pi Zero? You did write it down? As we now need it.
- $ ssh pi@<IP ADDRESS OF PI ZERO W>
This will then prompt you to confirm that you are happy to connect, and then ask for the default password, which is raspberry. Any command entered into the terminal is now run on the Pi Zero W.

For Windows users, you will need to download the puTTY application. Install puTTY and then run it. In the centre of the dialog box is a space called Host and in there type in the IP address of the Pi Zero W. You will then be prompted to accept the connection, then provide the username and password, which are respectively pi and raspberry.
We are now in the terminal and able to control our Raspberry Pi Zero W remotely! So now we need to edit the files for the photobooth. For this we need to be in the jam-photobooth folder, and to do that from the terminal type.
- $ cd jam-photobooth
Inside this folder there are three files that we need to edit.
auth.py - Contains the Twitter authentication codes to enable our camera to post pics to Twitter.
photobooth.py - Which is the main body of code that handles taking pictures and waiting for button presses.
text.py - Contains the text that will display when the tweet is posted to Twitter.
We shall start in reverse order, and that means editing the text.py file to add a nice message when a tweet is posted. To edit the file type.
- $ nano text.py
Inside the file are blocks of code that are used to store the text in various languages. As we speak English, we shall edit the English text, but if you speak another language, please do scroll down the list and select your language.
In particular, we need to edit the line starting #'tweet': and change it to meet our needs. For example, if we are taking pics at a 21st birthday party for a girl called Jennifer.
- #'tweet': “Jennifer’s 21st Birthday Bash”,
Obviously, change this to meet your requirements! Unless you are making this for Jennifer’s 21st!
To save the file press CTRL + O and then press CTRL + X to exit.
Back at the terminal and we next edit the photobooth.py file, so in the terminal type.
- $ nano photobooth.py
The first change that we made to the code is for line 22, which controls the camera resolution, how detailed and large our pictures will be. For Twitter use, we changed the resolution to 1024 x 768 by changing the code to this.
- camera.resolution = (1024, 768)
We then changed line 24, which contains an option to change the size of the text used on the screen, as our screen is pretty small we changed this to 40pt.
- camera.annotate_text_size = 40
The next and final line that we edit in this file is line 89, which starts photos = capture_photos. The photobooth code is set to take four pics and tweet all four at once. But perhaps you would like to do fewer pics? Then change the value in the parenthesis () to the number you require. Note that Twitter only supports four images per tweet!
- photos = capture_photos(1)
All done and we can now save the file, press CTRL + O and then press CTRL + X to exit.
Connecting to Twitter
The last file to edit, auth.py takes a little more work! The auth.py file contains the details needed for your code to work on Twitter. We need four details for our code to work
Consumer Key (also known as API Key)
Consumer Secret (API Secret)
Access Token
Access Token Secret
These details are personal to your account! Do not post them online or share them! Anyone who has these details can post content and impersonate you!
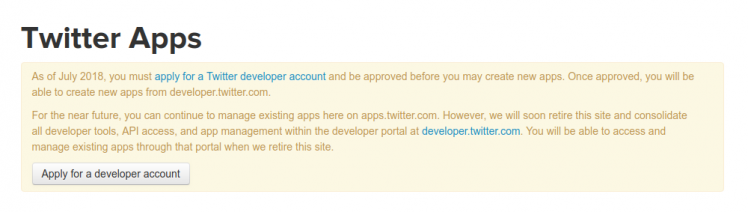
But how can you get your own set of API keys etc.? Well go to apps.twitter.com and login using your Twitter details. As of July 2018 new applications (this is what Twitter calls projects such as ours that need access to Twitter) are required to sign up for a developer account and you need to follow the steps to create the account and explain what it will be used for. At the time of writing (August 2018) it was taking many days to get an app authorised, so plan your project well in advance!
 Yes, we pixelated our details for the Electromake Bubble Machine example, but this is the screen where all of your API details are stored.
Once your account is authorised, you will need to visit the Keys and Access Tokens tab and copy the details from there into the auth.py file. You can do this by editing auth.py
- $ nano auth.py
And when done and save the file, press CTRL + O and then press CTRL + X to exit.
Just like an Apple event ... there’s just one more thing!
All of the images taken using this camera will have a logo in the bottom right of the screen. Right now it is the Raspberry Pi Foundation’s Big Birthday Weekend, but you can easily make your own logo.
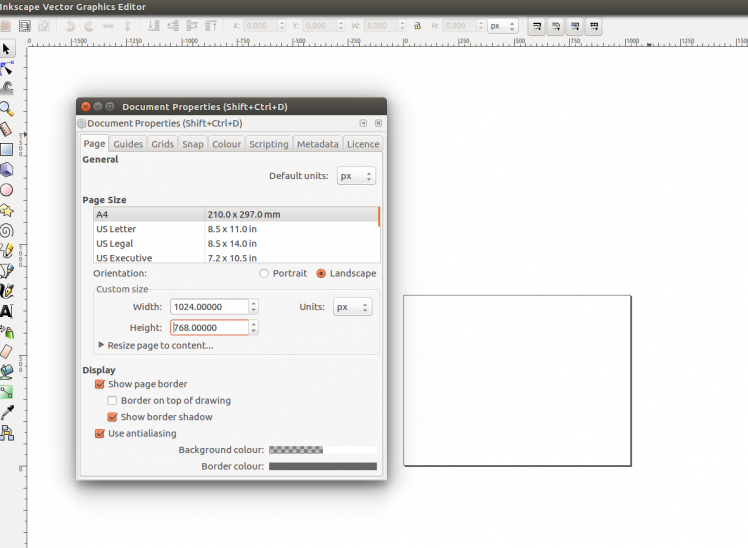
All you need to do is create a new project in Inkscape (on your main computer, not the Pi Zero), and change the File >> Document Properties so that your image matches the resolution of the images that your camera will take. Now create a rectangle of any size, ensure that it has no fill or stroke (line) colour. You can double left click on Stroke: to bring up the colour properties of an object.
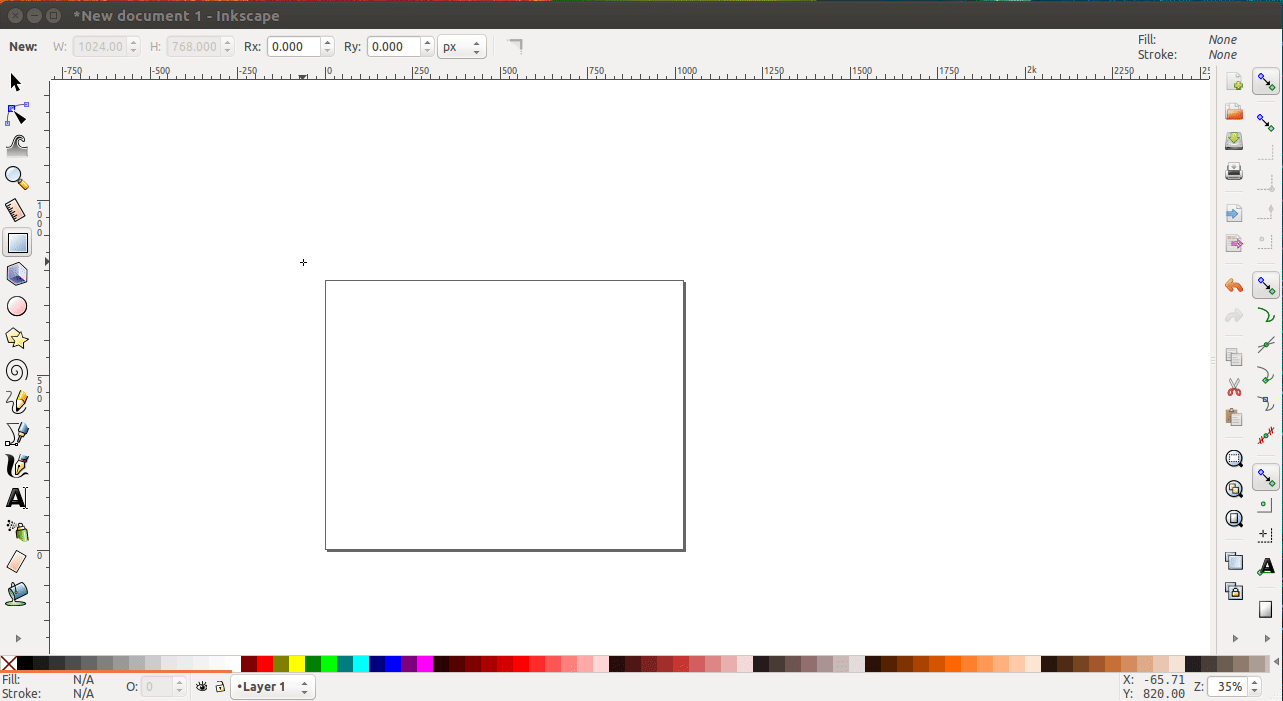
Now use the Transform option from the Object and change the size of the rectangle to match the camera resolution. Then use the Align and Distribute option again from the Object menu. Change the alignment so that the rectangle is in the centre of the ‘page’.
The next step is to add your logo wherever you wish it to be. The final step is to click on File >> Export and save the entire page as a .png file called bbw.png now we need to get this file into the jam-photobooth folder. The simplest way is to insert the micro SD of the Pi Zero W into your computer (after shutting it down) and copy it across. But this only works for Linux and Mac users. Windows users will need to use software such as Ext2Fsd which can read and write to the Raspberry Pi micro SD card. Once complete, eject the card, put it back in the Pi and start it up and start using the selfie camera that we have created!
Enjoy and tweet responsibly!
Code
Credits
Related products


Leave your feedback...